A flowbot can simulate conversations with customers. It is capable of forwarding customers to the right team, providing info by asking questions with multiple-choice options, and much more. In this article, you’ll learn everything you need to know about Trengo's flowbot feature.
Also feel free to watch this webinar, in which we explain why and how to set up your own flowbot in Trengo.
Flowbot anatomy
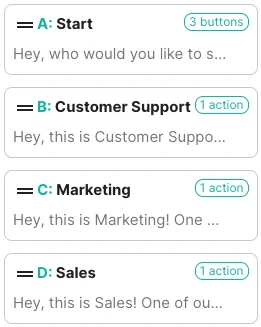
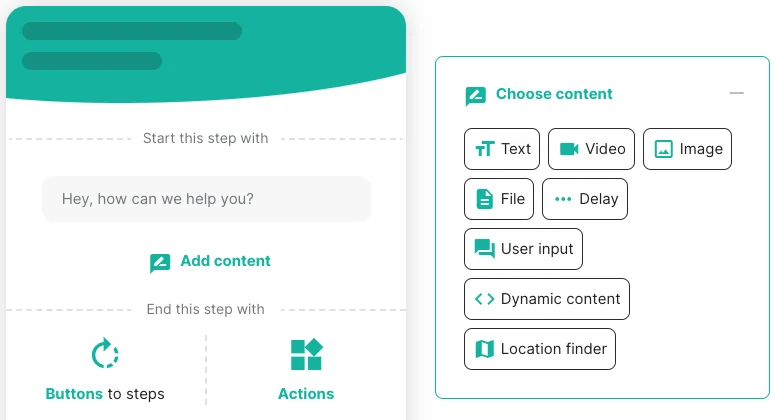
A flowbot always has a starting and an ending point. Between the start and end of your flowbot, you’ll add steps. Every step in your flowbot contains a form of content and has to end in either ‘buttons’ or ‘actions’.

Flowbot content
You can add different types of content to the steps of your flowbot. You can read a more elaborate explanation of these types of content in this Trengo Help Center article.

Flowbot actions
When your customer reached an endpoint in your flowbot, you can select the action your flowbot has to take.

There are two types of flowbot actions.
Regular actions
🔘 Attach label: This action lets you attach one or more labels to the current ticket.
🔘 Add to contact group: Add the customer to one of your contact groups.
🔘 Forward to email: Forward the ticket to your email address.
Ending actions
🔘 Mark as new ticket: The current ticket gets marked as ‘New’ in your inbox.
🔘 Add to contact group: Add the customer to one of your contact groups.
🔘 Close ticket: Close the ticket automatically.
🔘 Go to step: Take the customer to another step in your flowbot.
Now you're up to speed with the flowbot's anatomy, you are ready to add your own flowbot to Trengo!


