After adding a web widget to your inbox, you’ll find that per channel you add to the web widget, different text is used to instruct and inform your customers. All these texts are customisable by navigating to Settings > Web widgets > Your web widget > Translations and changing them there. Below, you’ll find all the customisable texts and where they are shown.
General
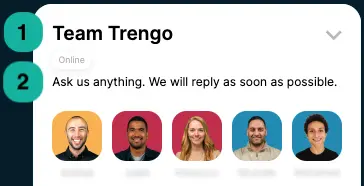
The general translations of the widget are not related to a channel and will always be shown at the top of the web widget.
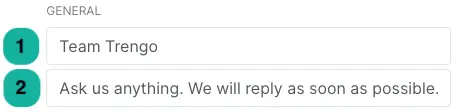
1. Company name: The text that is shown at the top of your web widget.
2. Ask us anything: This message is also displayed at the top of your web widget, informing your customer about your customer service process.
Social media channels
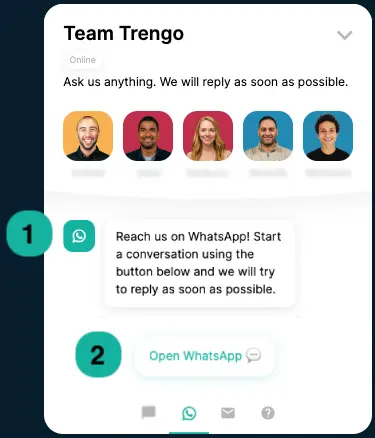
All the social messaging channels (WhatsApp, Facebook, and Telegram) have a similar text in the widget.
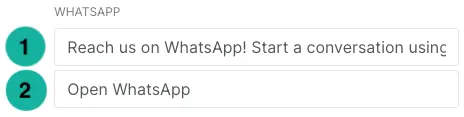
1. Reach us on …: This text encourages your customers to get in contact with you via the chosen social media channel.
2. Open …: The text displayed on the button that redirects your customers to the chosen social media platform.
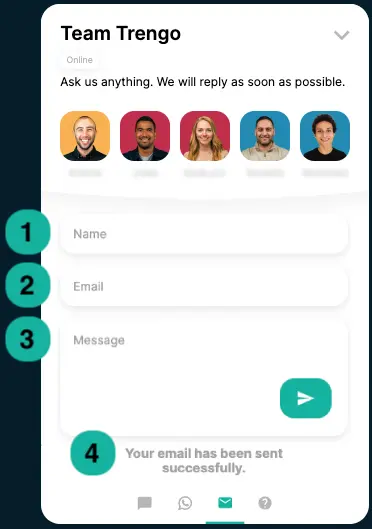
The name, email, and message fields of this form are fixed and the content of those fields can be adjusted in the translations for your email channel. The same goes for the confirmation.

1. Name: A placeholder for the ‘name’ field.
2. Email: A placeholder for the ‘email’ field.
3. Message: A placeholder for the ‘message’ field.
4. Your email has been sent: The message that shows as confirmation of a sent email.
Website chat
The web chat feature has lots of translations, but these will only be shown if the related feature is enabled.
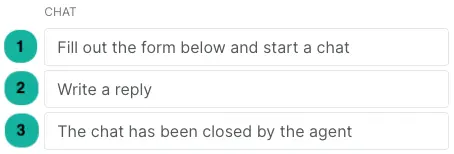
1. Fill out the form: The text that is shown when you enabled the ‘Pre-chat form’ feature.
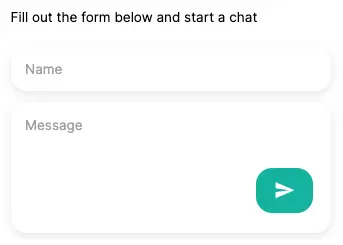
2. Write a reply: This text will show your customers where they can write their questions or replies.

3. The chat has been closed: When a chat conversation gets closed by a user of Trengo, this text will be shown.
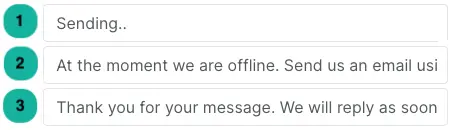
1. Sending: This text will show when a delay occurs when the customer is sending their message.
2. At the moment we are offline: In case you have enabled the ‘Show always as available’ feature, and no users are available for website chat, or it's outside your business hours, this message will be shown. It will ask your customer to fill in the form they can find below the text.
3. Thank you for your message (1): The text that is shown after your customer has filled out and send the ‘Show always as available’ form.
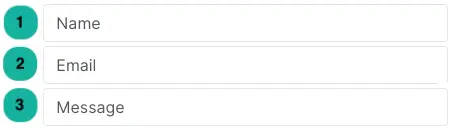
1. Name: This text is the placeholder for the section where a customer would leave their name in the ‘Show always as available’ form.
2. Email: This text is the placeholder for the section where a customer would leave their email address in the ‘Show always as available’ form.
3. Message: This text is the placeholder for the section where a customer would leave their message in the ‘Show always as available’ form.
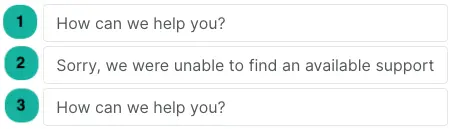
1. How can we help you? (1): This text is shown when the web widget is closed, encouraging your customer to open your web widget.

2. Sorry, we were unable to find an agent: The text that is shown when no users are available to answer the customers’ questions.
3. How can we help you? (2): This is the first automated message that will be sent to your customer after opening the web widget and selecting the web chat feature.
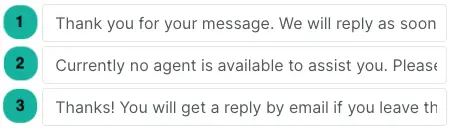
1. Thank you for your message (2): The message that will be shown when the chat is online and the ‘Show always as available’ feature is enabled.
2. Currently no agent is available: This text is shown when the customer starts a chat and you have ‘Show always as available’ enabled, and no user is available or it is outside business.
3. You will get a reply by email: After the customer leaves their email address in the ‘Show always as available’ feature, this message is displayed.

1. You will no longer receive replies: When a customer removes their email address in a chat with the ‘Show always as available’ feature enabled, this message will show.
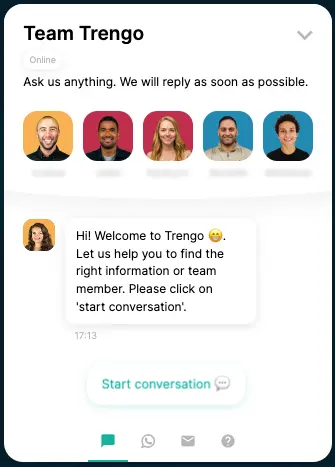
2. Start conversation: When you have a flowbot enabled, this text is shown on the button, with which the customer can start a conversation with your flowbot.

1. Screen share: The title for the screen sharing option.
2. Accept: This text is on the button with which a customer can accept your screen sharing request.
3. Decline: The text displayed on the button with which a customer can decline your screen sharing request.

1. Starting screen sharing: The message that is displayed when the screen sharing is booted up.
2. Your screen is currently shared: When a screen sharing session is live, this text is shown to your customer.
3. Stop: The text shown on the button with which a customer can stop the screen sharing session.
4. Agent has invited you: This message is displayed once a user in Trengo invites a customer to share their screen.
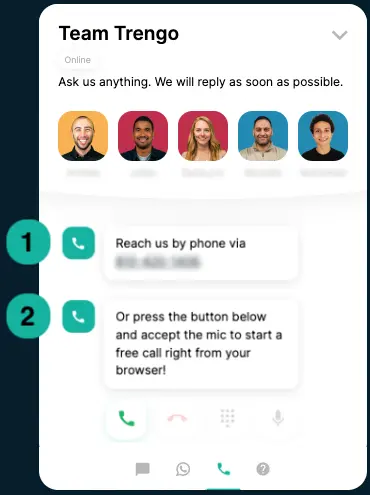
Voice
The following text is displayed when you have your voice channel integrated with your web widget.

1. Reach us by phone: An automated message you can use to notify your customers about your phone number.
2. Or press the button below: The message that is shown when you have ‘Call via browser’ enabled, instructing customers about the feature.