Journeys is Trengo's no-code customer journey builder that creates full-funnel conversation flows in 70+ languages in minutes, so your team can stop wasting time on admin work and start providing personalised, instant support.
Here are some benefits on using Journeys:
- Personalisation. Its built multilingual in over 70 languages, it will be able to offer personalisation across languages without needing additional agents.
- A proactive approach. With the assistance of AI, the conversation sounds more natural, the tone of voice and style of the conversation can be chosen during the set up.
- Smart routing. Unlike other bots, Journeys is able to do smart routing combination in minutes. Some of the capabilities are: assign to a specific team, route to a human agent when there's no available answer, automatically end the conversation and many more.
- Instant support on various channel. This feature will allow you to have 24/7 support for the customers. Long gone are the days when customers have to wait until the next opening hours to get an answer. On top of that, workflows can be embedded in various channel, such as: email, messaging (social media) and website widget.
- Round robin feature. You can also assign the ticket using the round robin feature to ensure that the team has to balance the team's workload.
Easy set up
Here are the steps to start using Journeys once you have them available in your account:
1. Check out the Trengo left side bar and click the Journeys icon
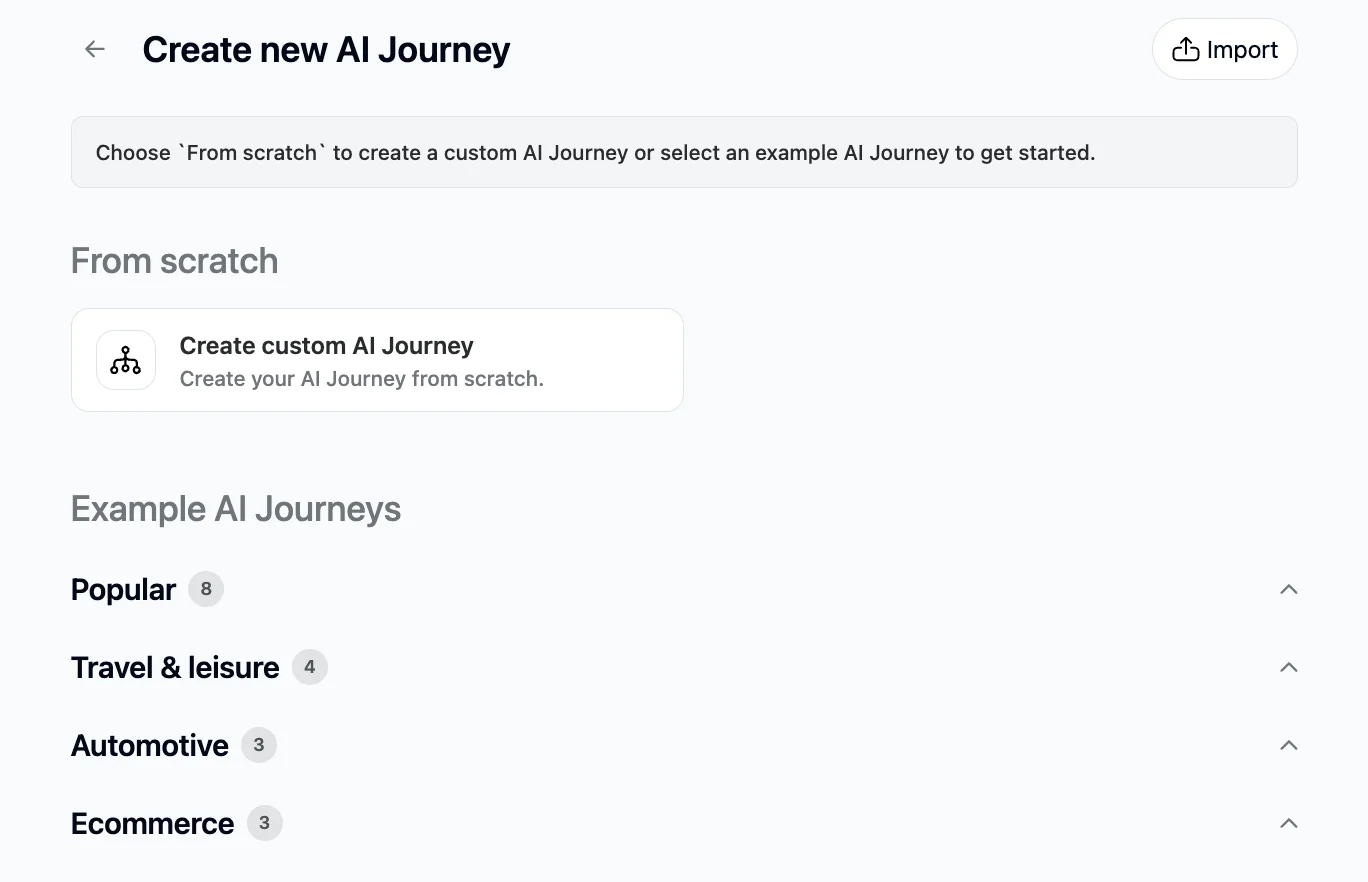
2. You will see this screen as the homepage of the Journeys and you may use some of the sample to start the templates but you can also create from scratch. Click 'Create new AI journey'
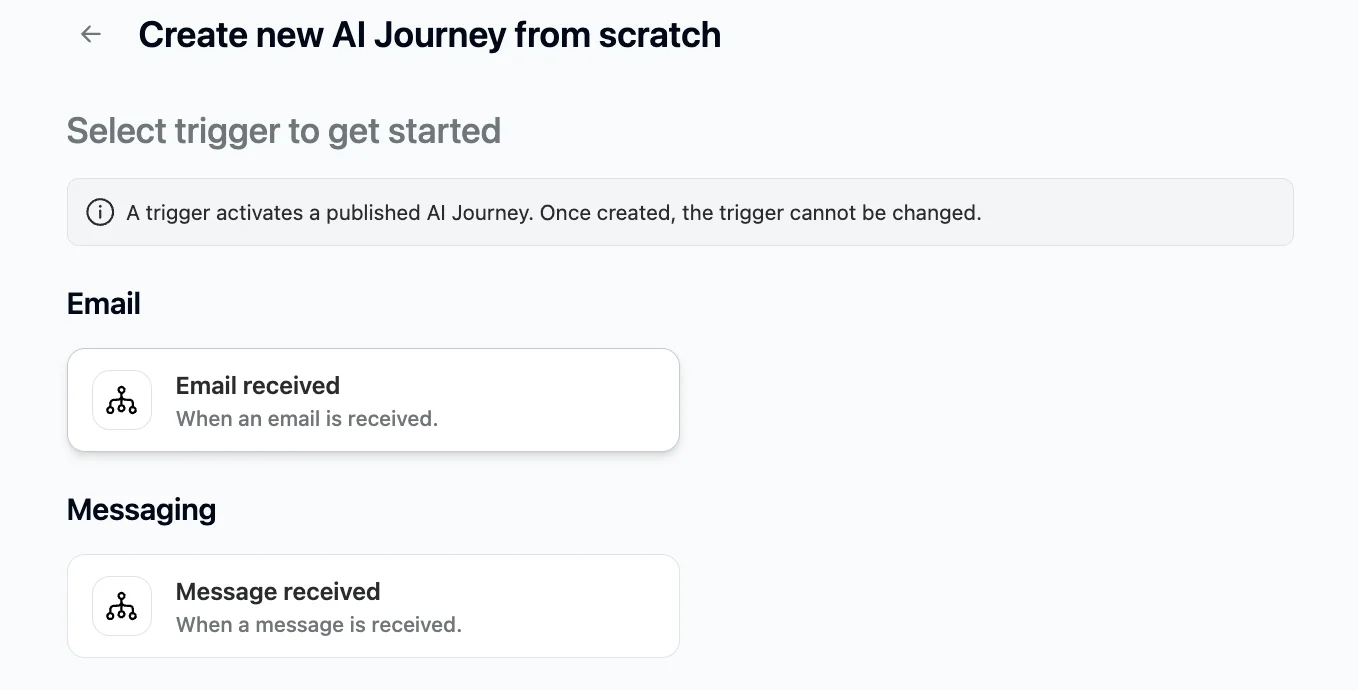
3. Choose the trigger. Note: once it's chosen and a journey is created, you cannot change the trigger anymore.
4. Once a trigger is chosen, then you can start creating a journey in the canvas

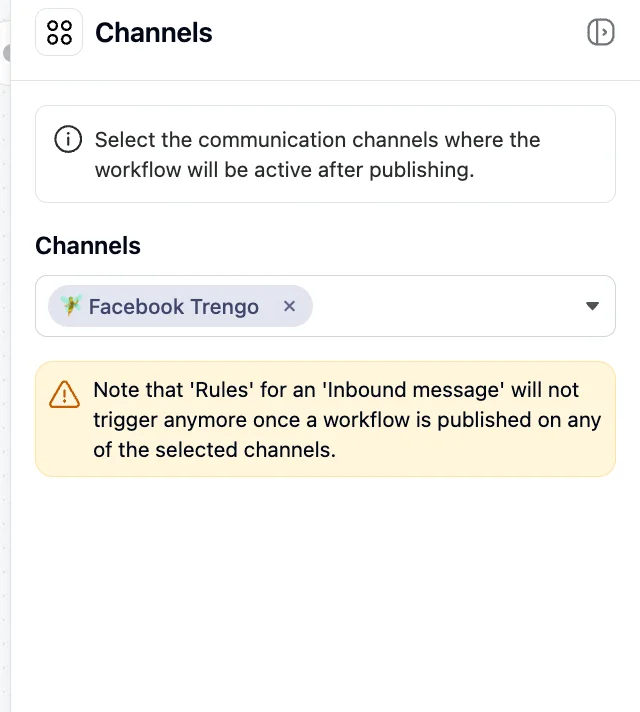
5. Once you choose 'Select channels', you can now start building the journey
6. Start adding the action as you go along, you can choose the actions provided in the menu:
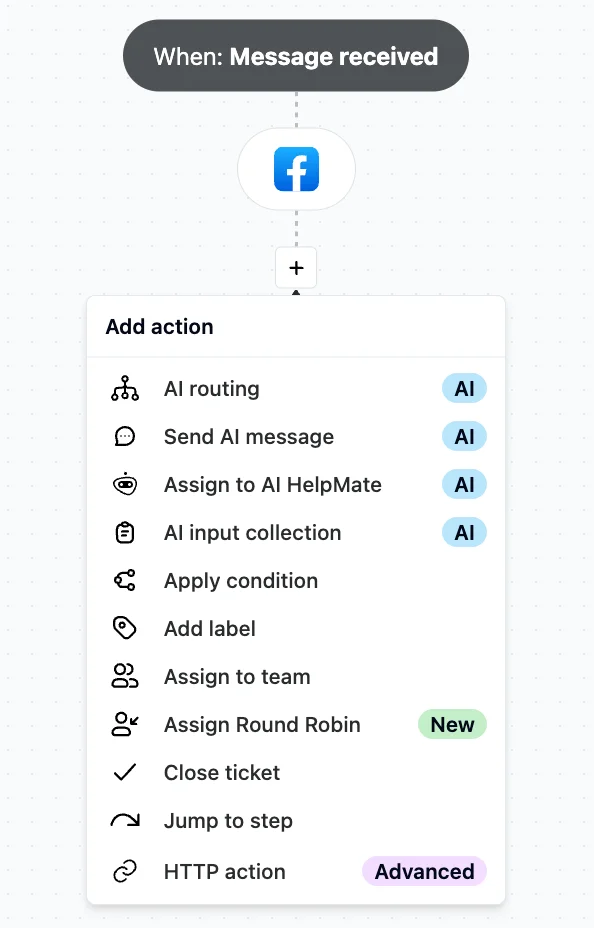
7. Each and every action has a different function. The action is self-explanatory, for example, 'Send AI message', it will mean that we will send a greeting that's AI-powered. Let's use that as an example:
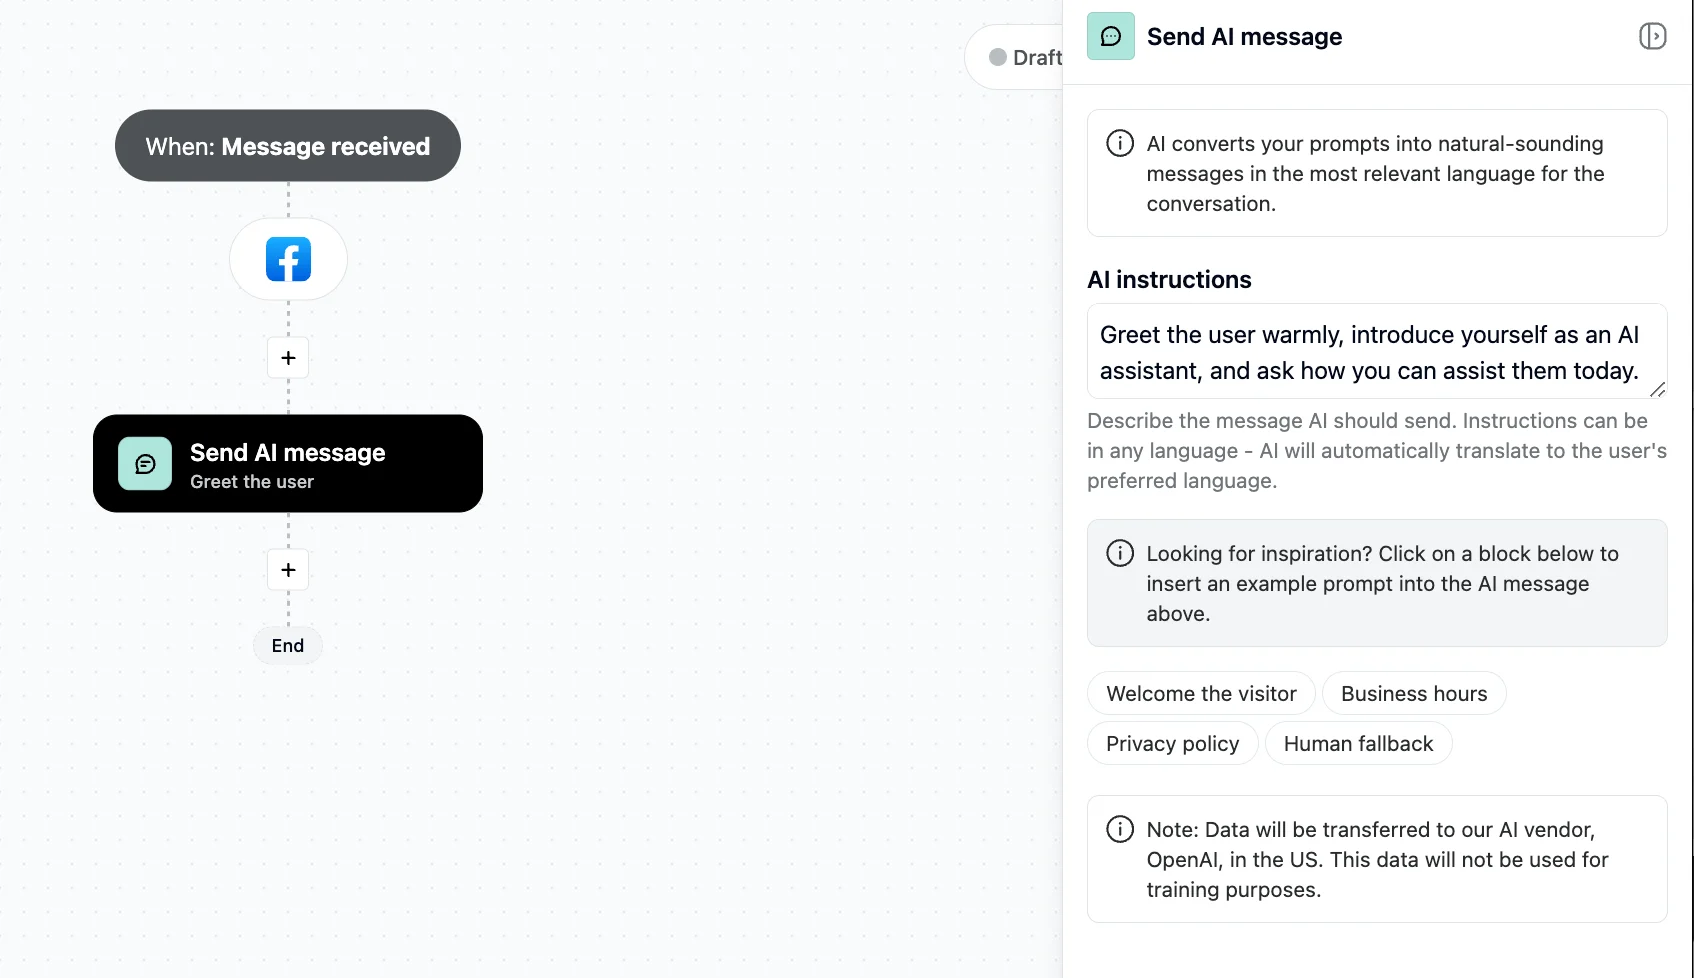
Once you choose the action, it will trigger a dialogue box on the right side of the journeys where you can fill your criterial for this particular AI message. We also have some examples for your inspiration. Once you're good to go with the instruction, don't forget to click 'save.
8. Click the + button to add more action in your journey. In this example, we'll use 'AI input collection' and you fill the right side column as well.
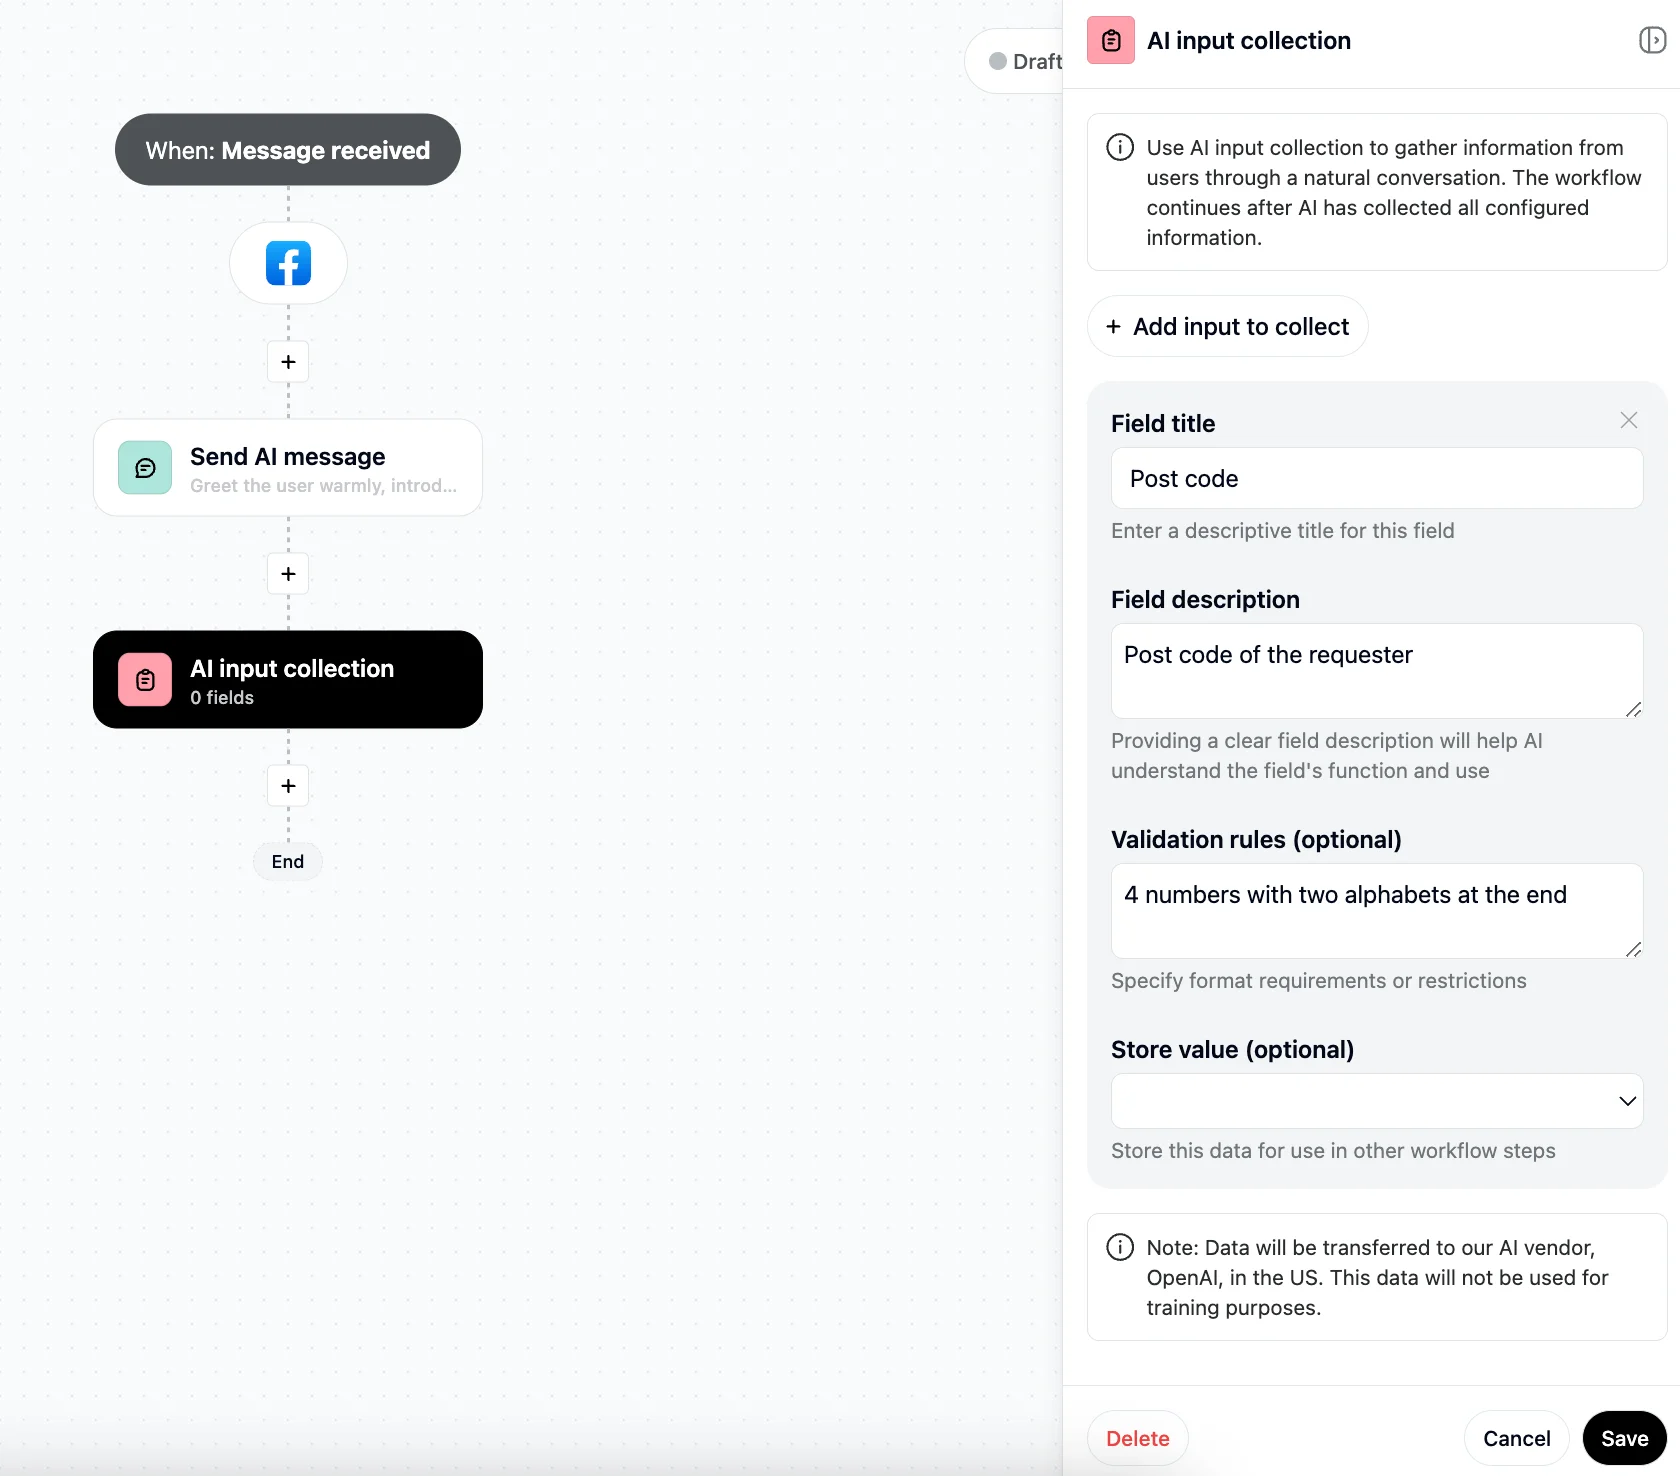
Once you click 'Save', you need to think of the next action. What should happen after the user input the post code? Do you have a specific team to assign or would you ask more question? In this example, after asking the postcode we'll assign it to the team who handles logistics. So, let's add one more action.
9. Click 'Assign to team'. Choose the assigned team on the dialogue box and to end the journey, click Save. You will see the 'End' at the bottom as per the picture below

Testing the journey
You can test the journey by clicking the 'Play' button on the top right

Once you clicked them, you will see a dialog box appear on the right side of your screen. In this box, you will be able to test out your own journey before publishing it. It's placed on the side of the journeys so you can easily adjust the action as needed.

Once you're good to go with the playground, you can click 'Publish changes'

There you have it! Your first journey has been created.
If you need a video guidance, you can watch our CPO, Patrick, explained Journeys in details here.


