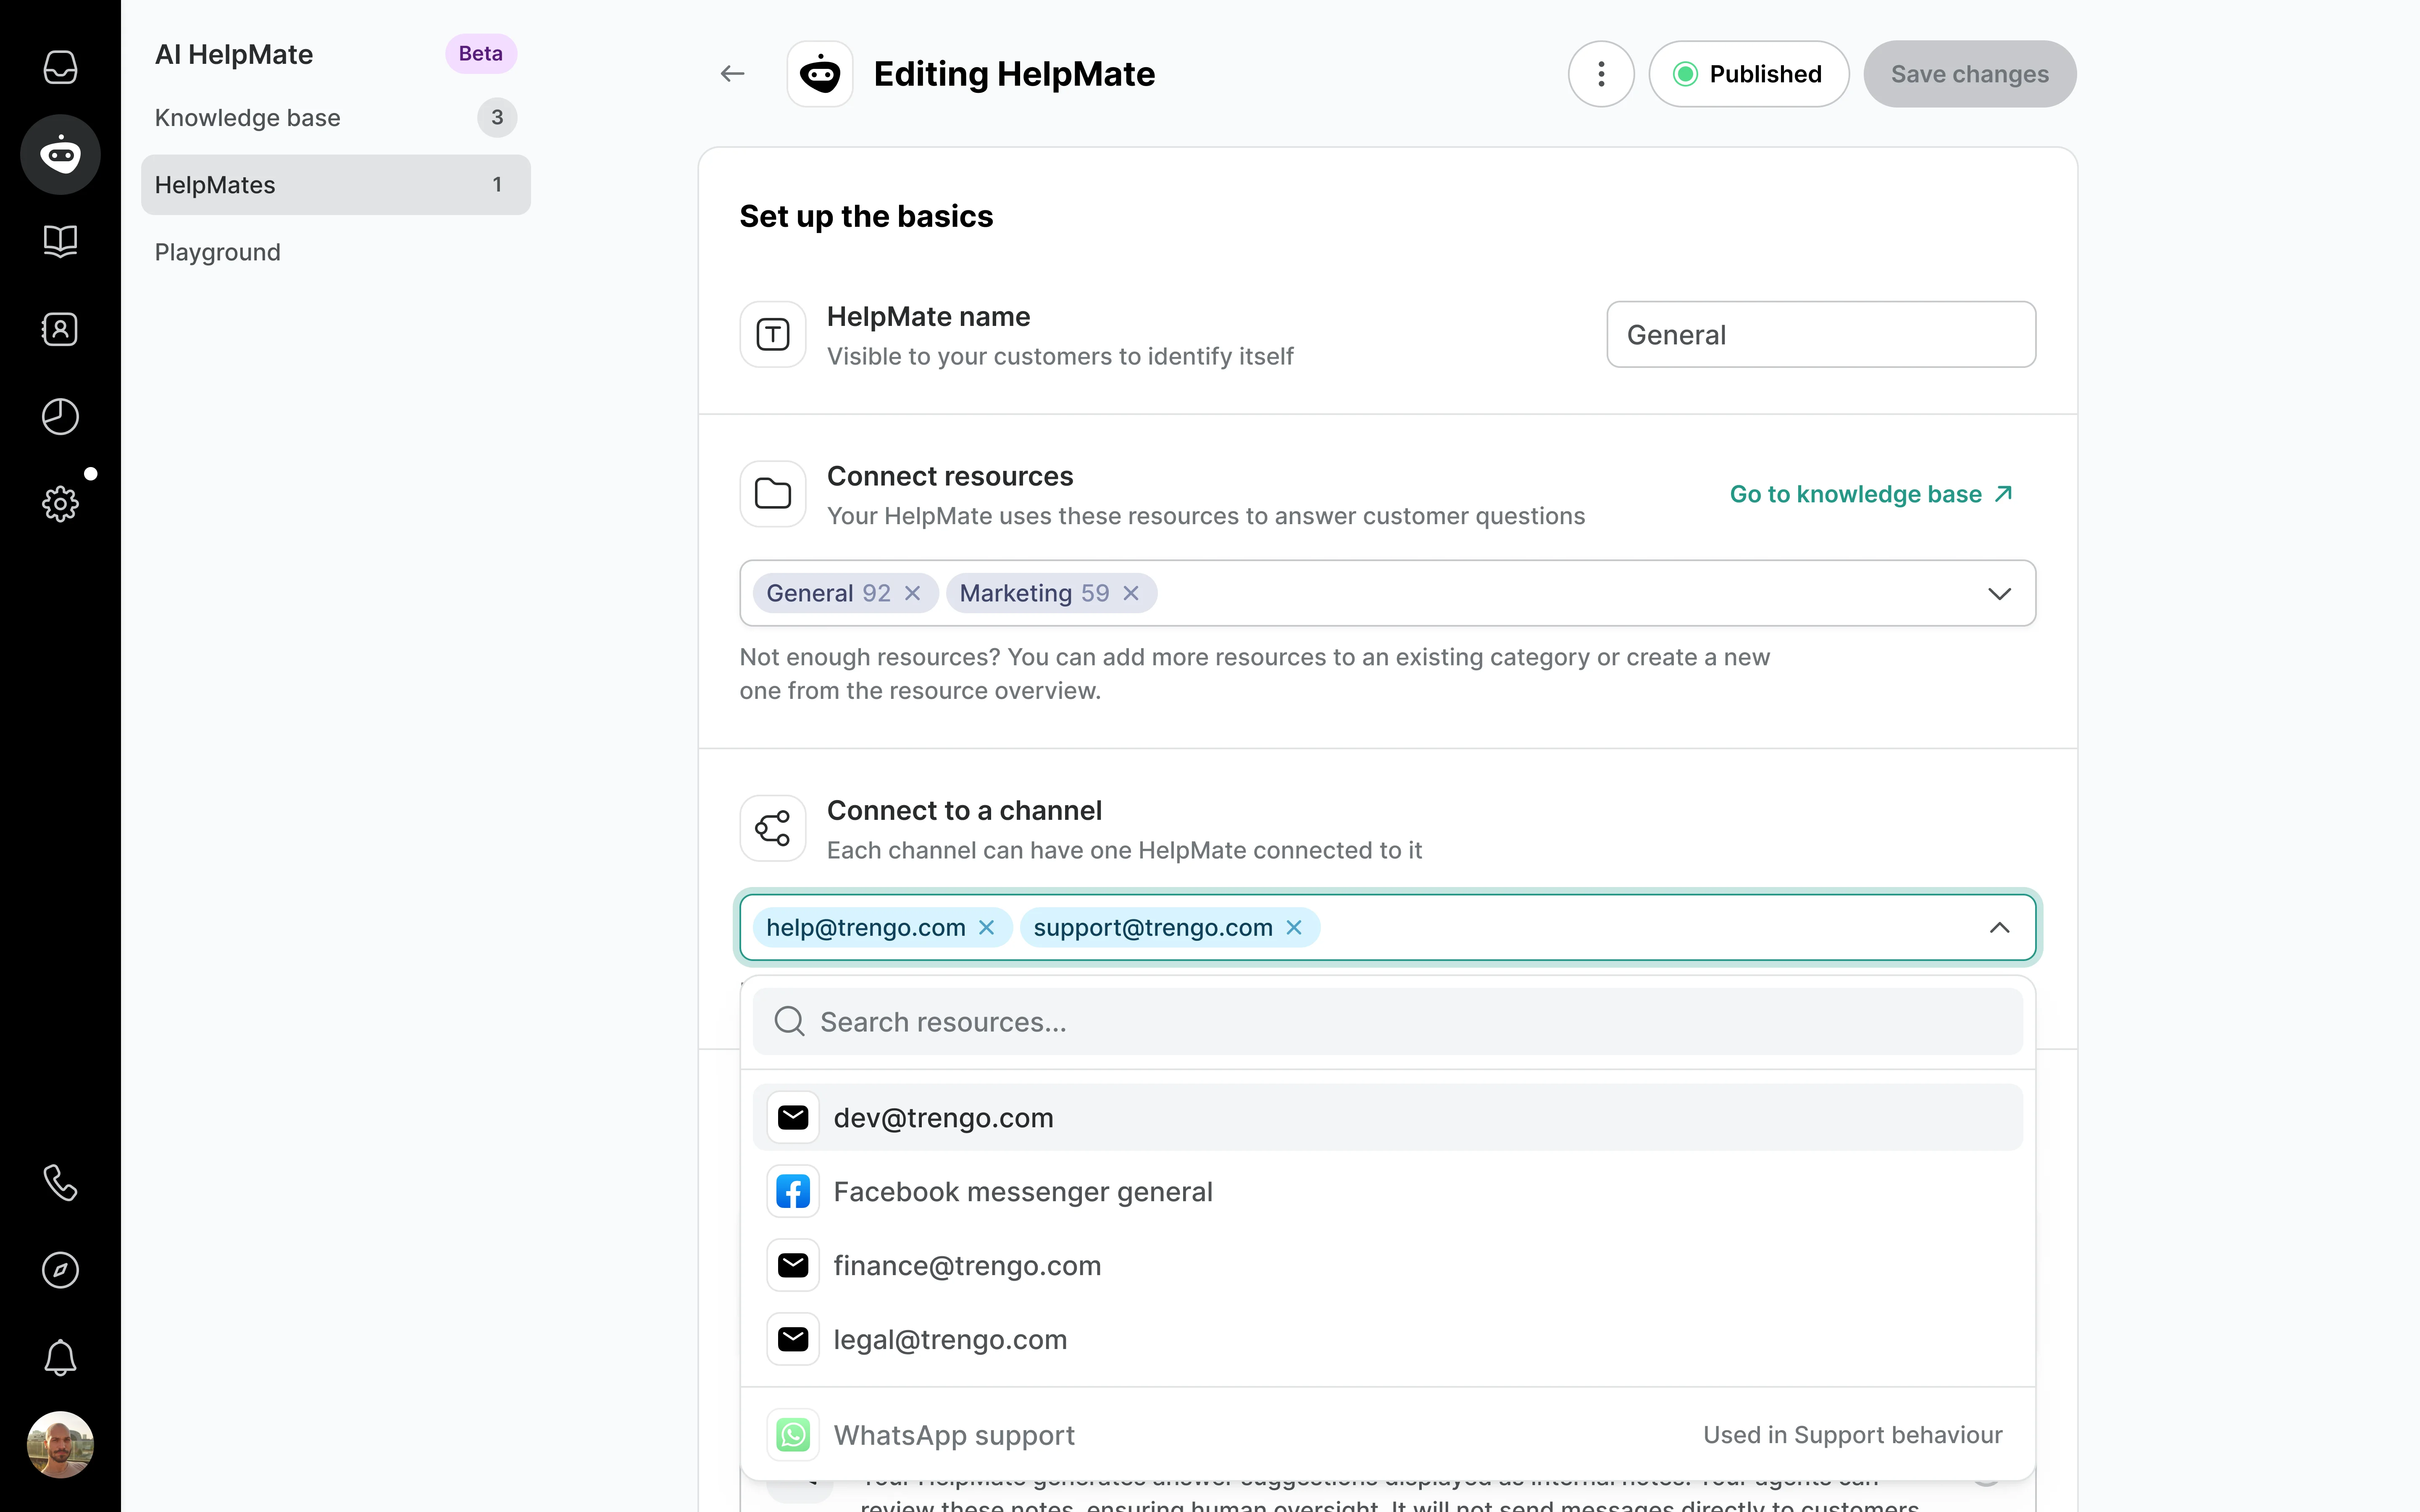
Beyond chat channels, you can connect your AI Agent to any email channel you have connected to your Trengo account. This allows you to provide your AI Agent’s service to customers who prefer reaching out to your business via email.
Currently, emails responses from your AI Agent are one-time events. When a customer emails you, your AI Agent will send a response then transfer the conversation to your Inbox for your human team to manage further. Our team is currently working on expanding AI Agent to handle full email conversations, just like chats!
Things to keep in mind
- Your AI Agent will be assigned the ‘Autopilot’ role automatically when you attach it to an email channel.
- If you assign your AI Agent to an email channel, we advise you to turn off Auto-replies if you have them activated. Not doing so may activate an infinite looping of Auto-reply vs. AI Agent emailing, which would overwhelm your inbox.
- Your AI Agent will generate an email signature based on the name you give it. This signature will override any pre-set email signatures you have in your Trengo account.
Setting up AI Agent on an email channel
1. Ensure that you have created your AI Agent with the right tone of voice and settings that fit your business.
2. Navigate to ‘AI Agents’ in the left side bar and select the AI Agent you want to assign to email.
3. Under ‘Connect to channel’, scroll down to your email channel and select it.

4. Make sure to click ‘Save changes’.
Testing email responses in the Playground
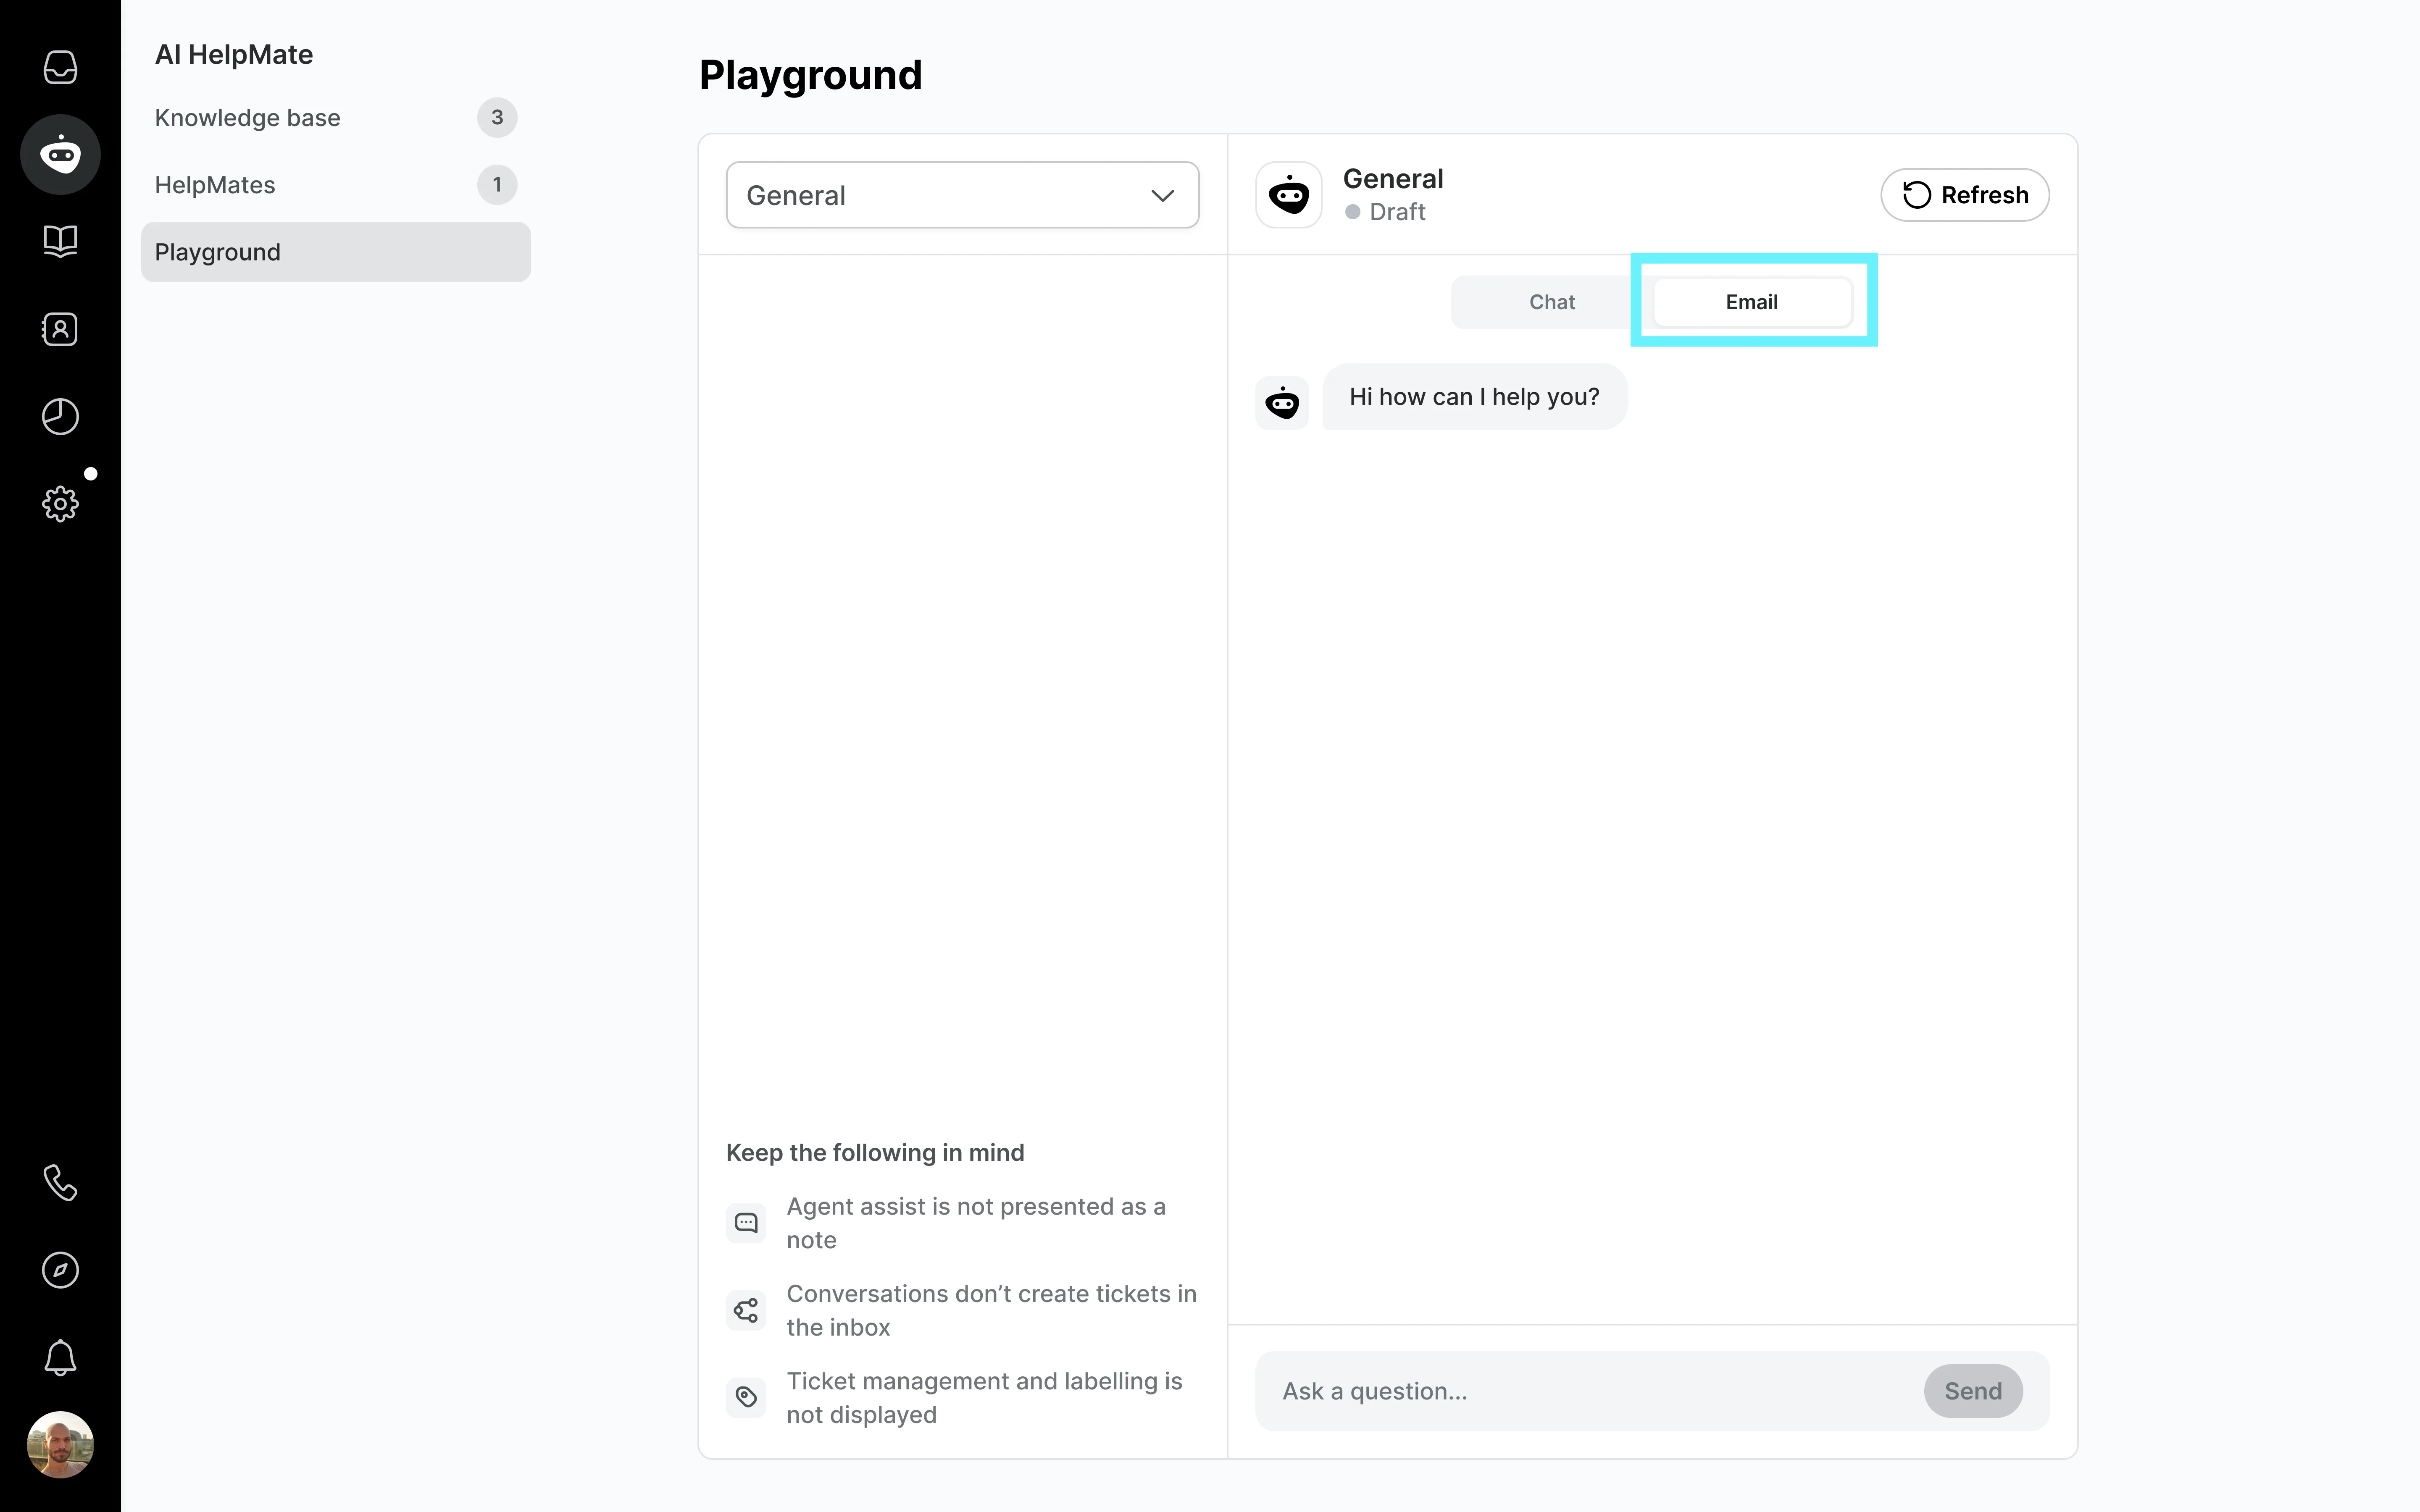
1. Navigate to the Playground and select the AI Agent you’ve assigned to your email channel.
2. In the Playground window, select the ‘Email’ tab. This will indicate that a different prompt designed for email responses will be used.

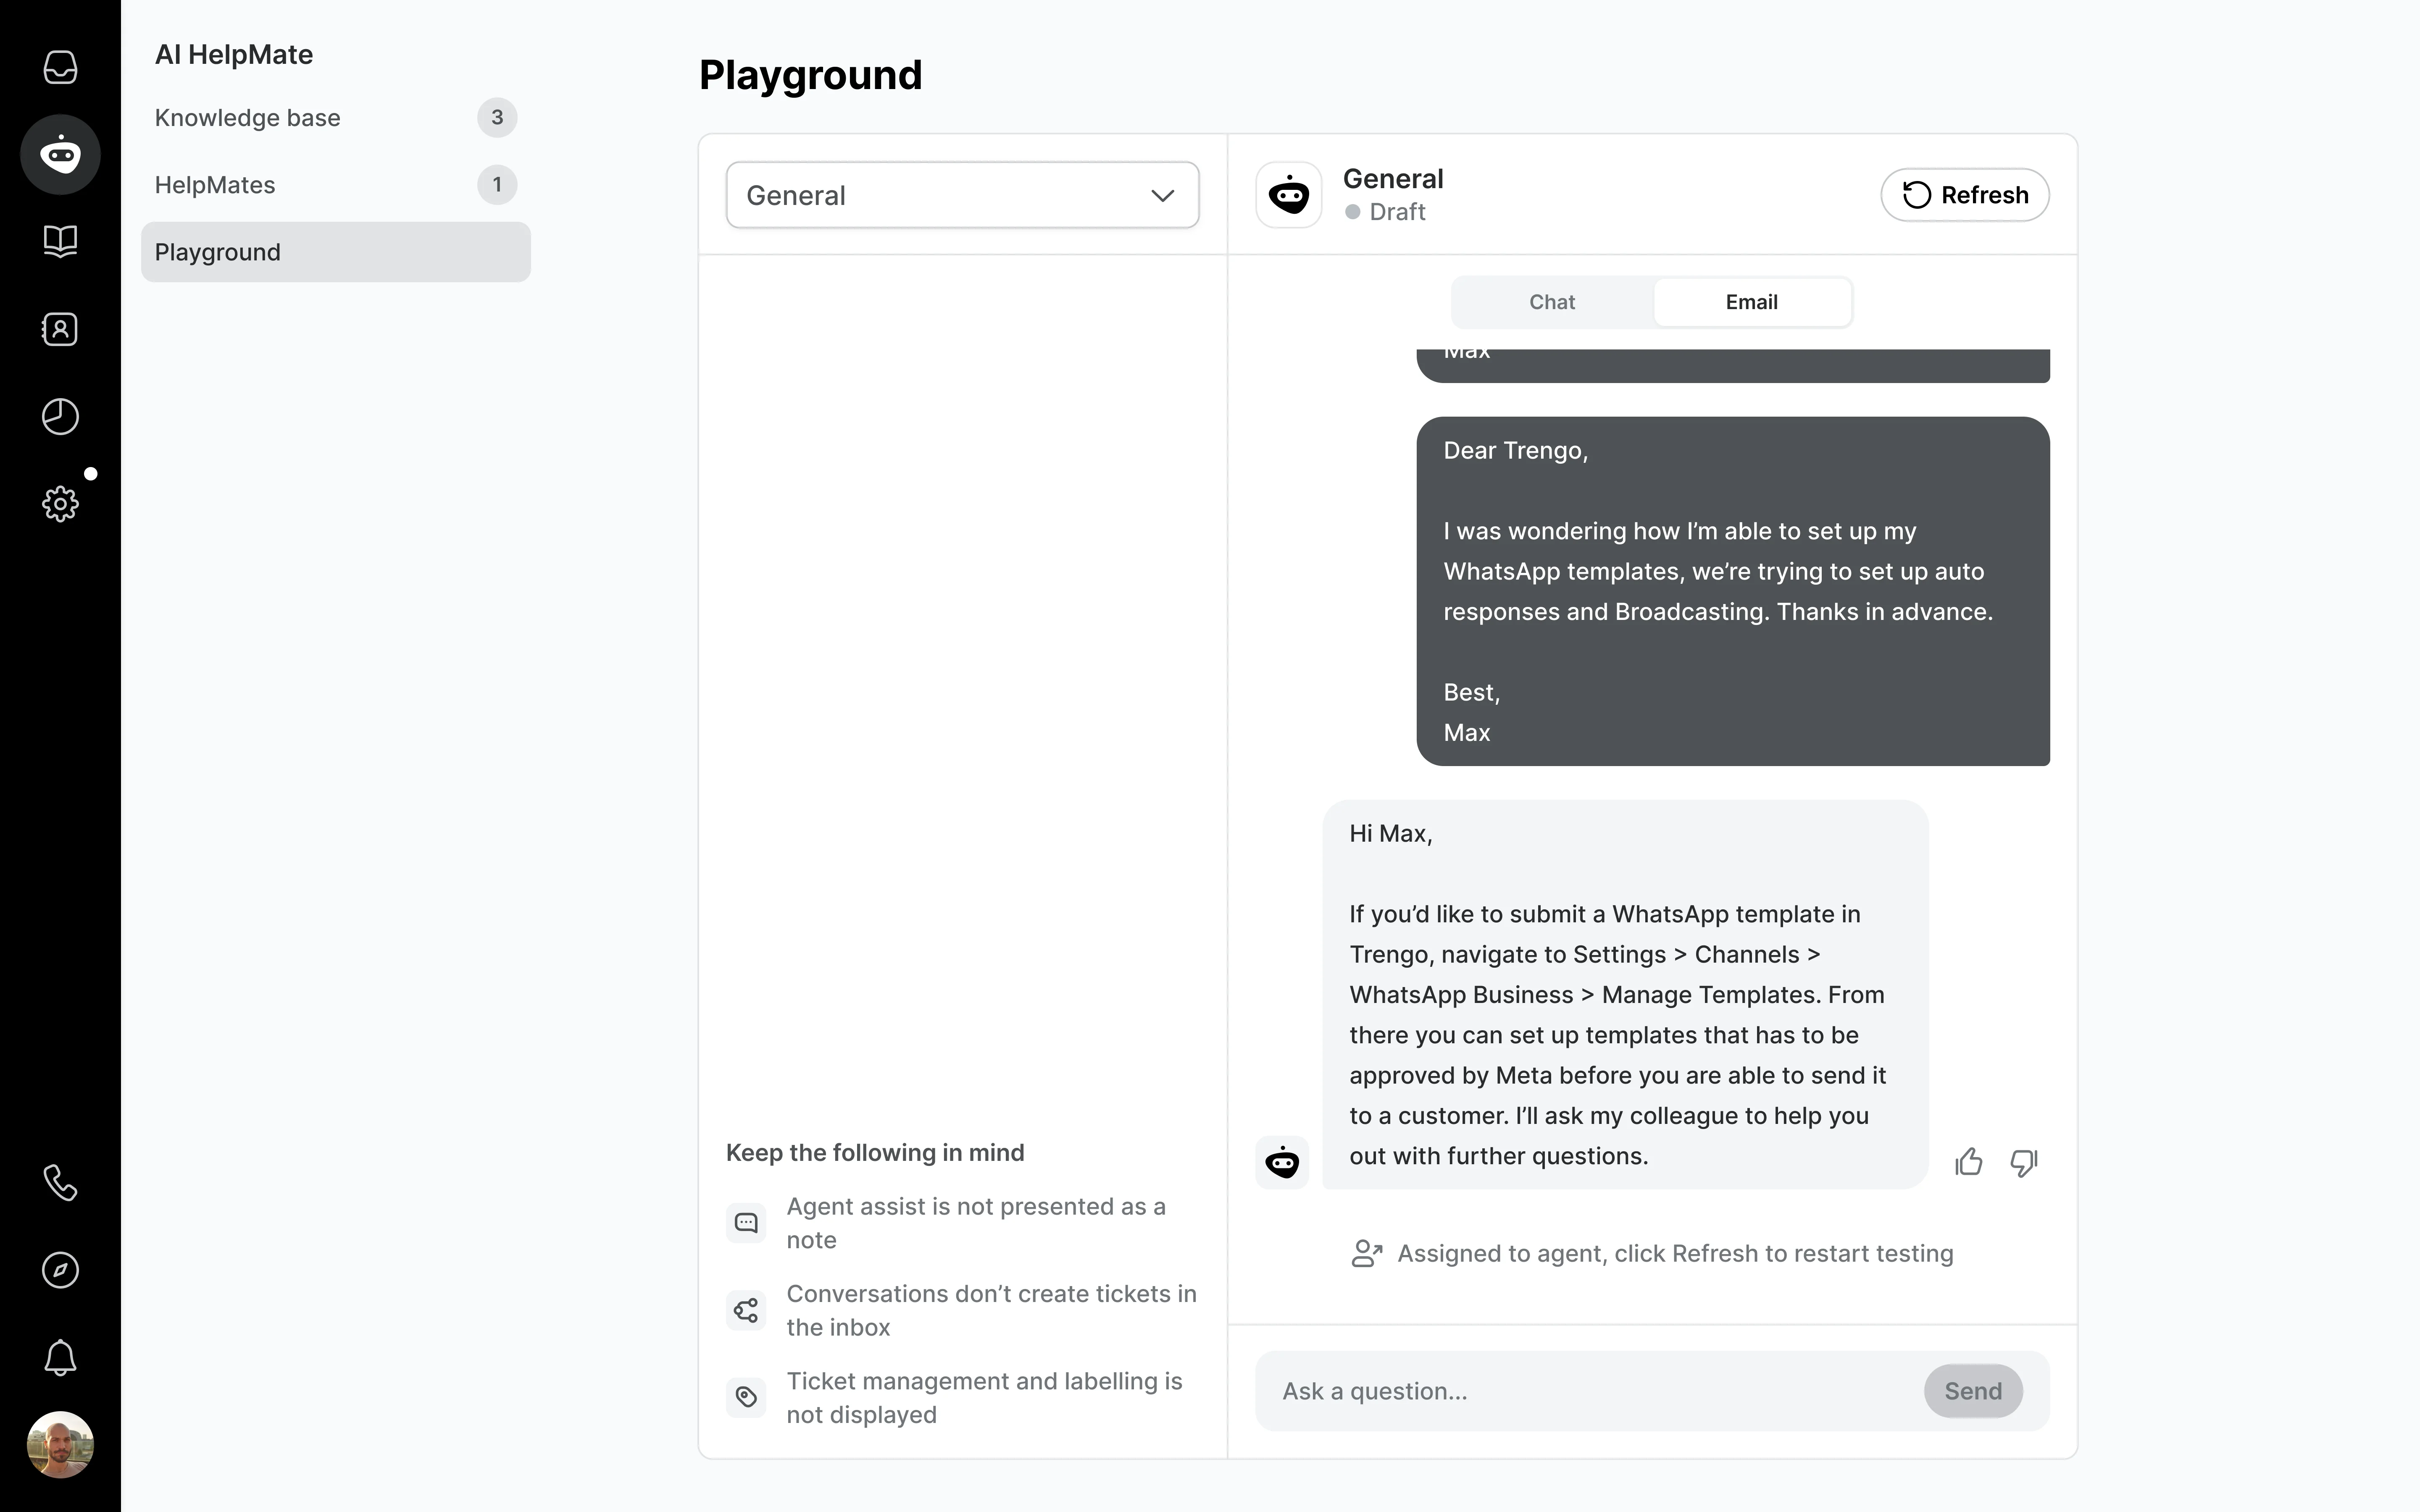
3. Type out a sample customer email in the text box.
4. Your AI Agent will respond in email format based on the communication style and tone of voice you set up. Note that AI Agent will not generate a signature in the Playground.

Assigning AI Agent emails in the inbox
When your AI Agent responds to a customer’s email and sends it to the inbox, it will appear as ‘New’. To help your human team members avoid missing these emails, we recommend setting up a Rule that automatically labels or assigns AI Agent emails.
1. To label AI Agent conversations, make sure you follow these steps first to create the appropriate label.
2. Navigate to Settings > Automations > Rules.
3. Click ‘Add Rule’.
4. Under the ‘Channels’ drop-down menu, select the email channel where you have assigned your AI Agent.
5. Under ‘When’, select ‘Inbound message is received’.
6. Under ‘Conditions’, select ‘Message body’ > ‘contains’ > [the name you’ve given your AI Agent]:

7. Under ‘Actions’, select ‘Attach label’ and include the label you created:

8. Once you have set the appropriate ‘Conditions’ and ‘Actions’, click ‘Save changes’. Your AI Agent conversations will now receive a Label when they arrive in your inbox.
9. To assign labelled conversations to a specific teammate or team, follow these steps. To automatically label incoming conversations, you can create a second Rule.


