


Custom fields are a great way to add extra information to a ticket, contact, profile, or user. Adding custom fields to your Trengo-inbox helps you gather extra information such as e.g. order numbers, license plates, or type of subscription. These fields all have a title and a field that can be filled in by the users in your Trengo account, customised per category.
Custom fields categories
Custom fields can be added as one of four categories, which can be found below.
🔘 Ticket: Use this category to add information that is relevant to a specific conversation. Examples of these can be an order number, a link to a webpage, or a specific product.

🔘 Contact: This category can be used to add information that is specific to this contact. This can be a customer number, an address, or their language, for example.

🔘 Profile: Choose this category to add information that is specific to a profile.

🔘 User: This category is specifically used to add custom information to your users. Think of their job description or working hours for example. These fields can later also be referred to in a personalised signature.

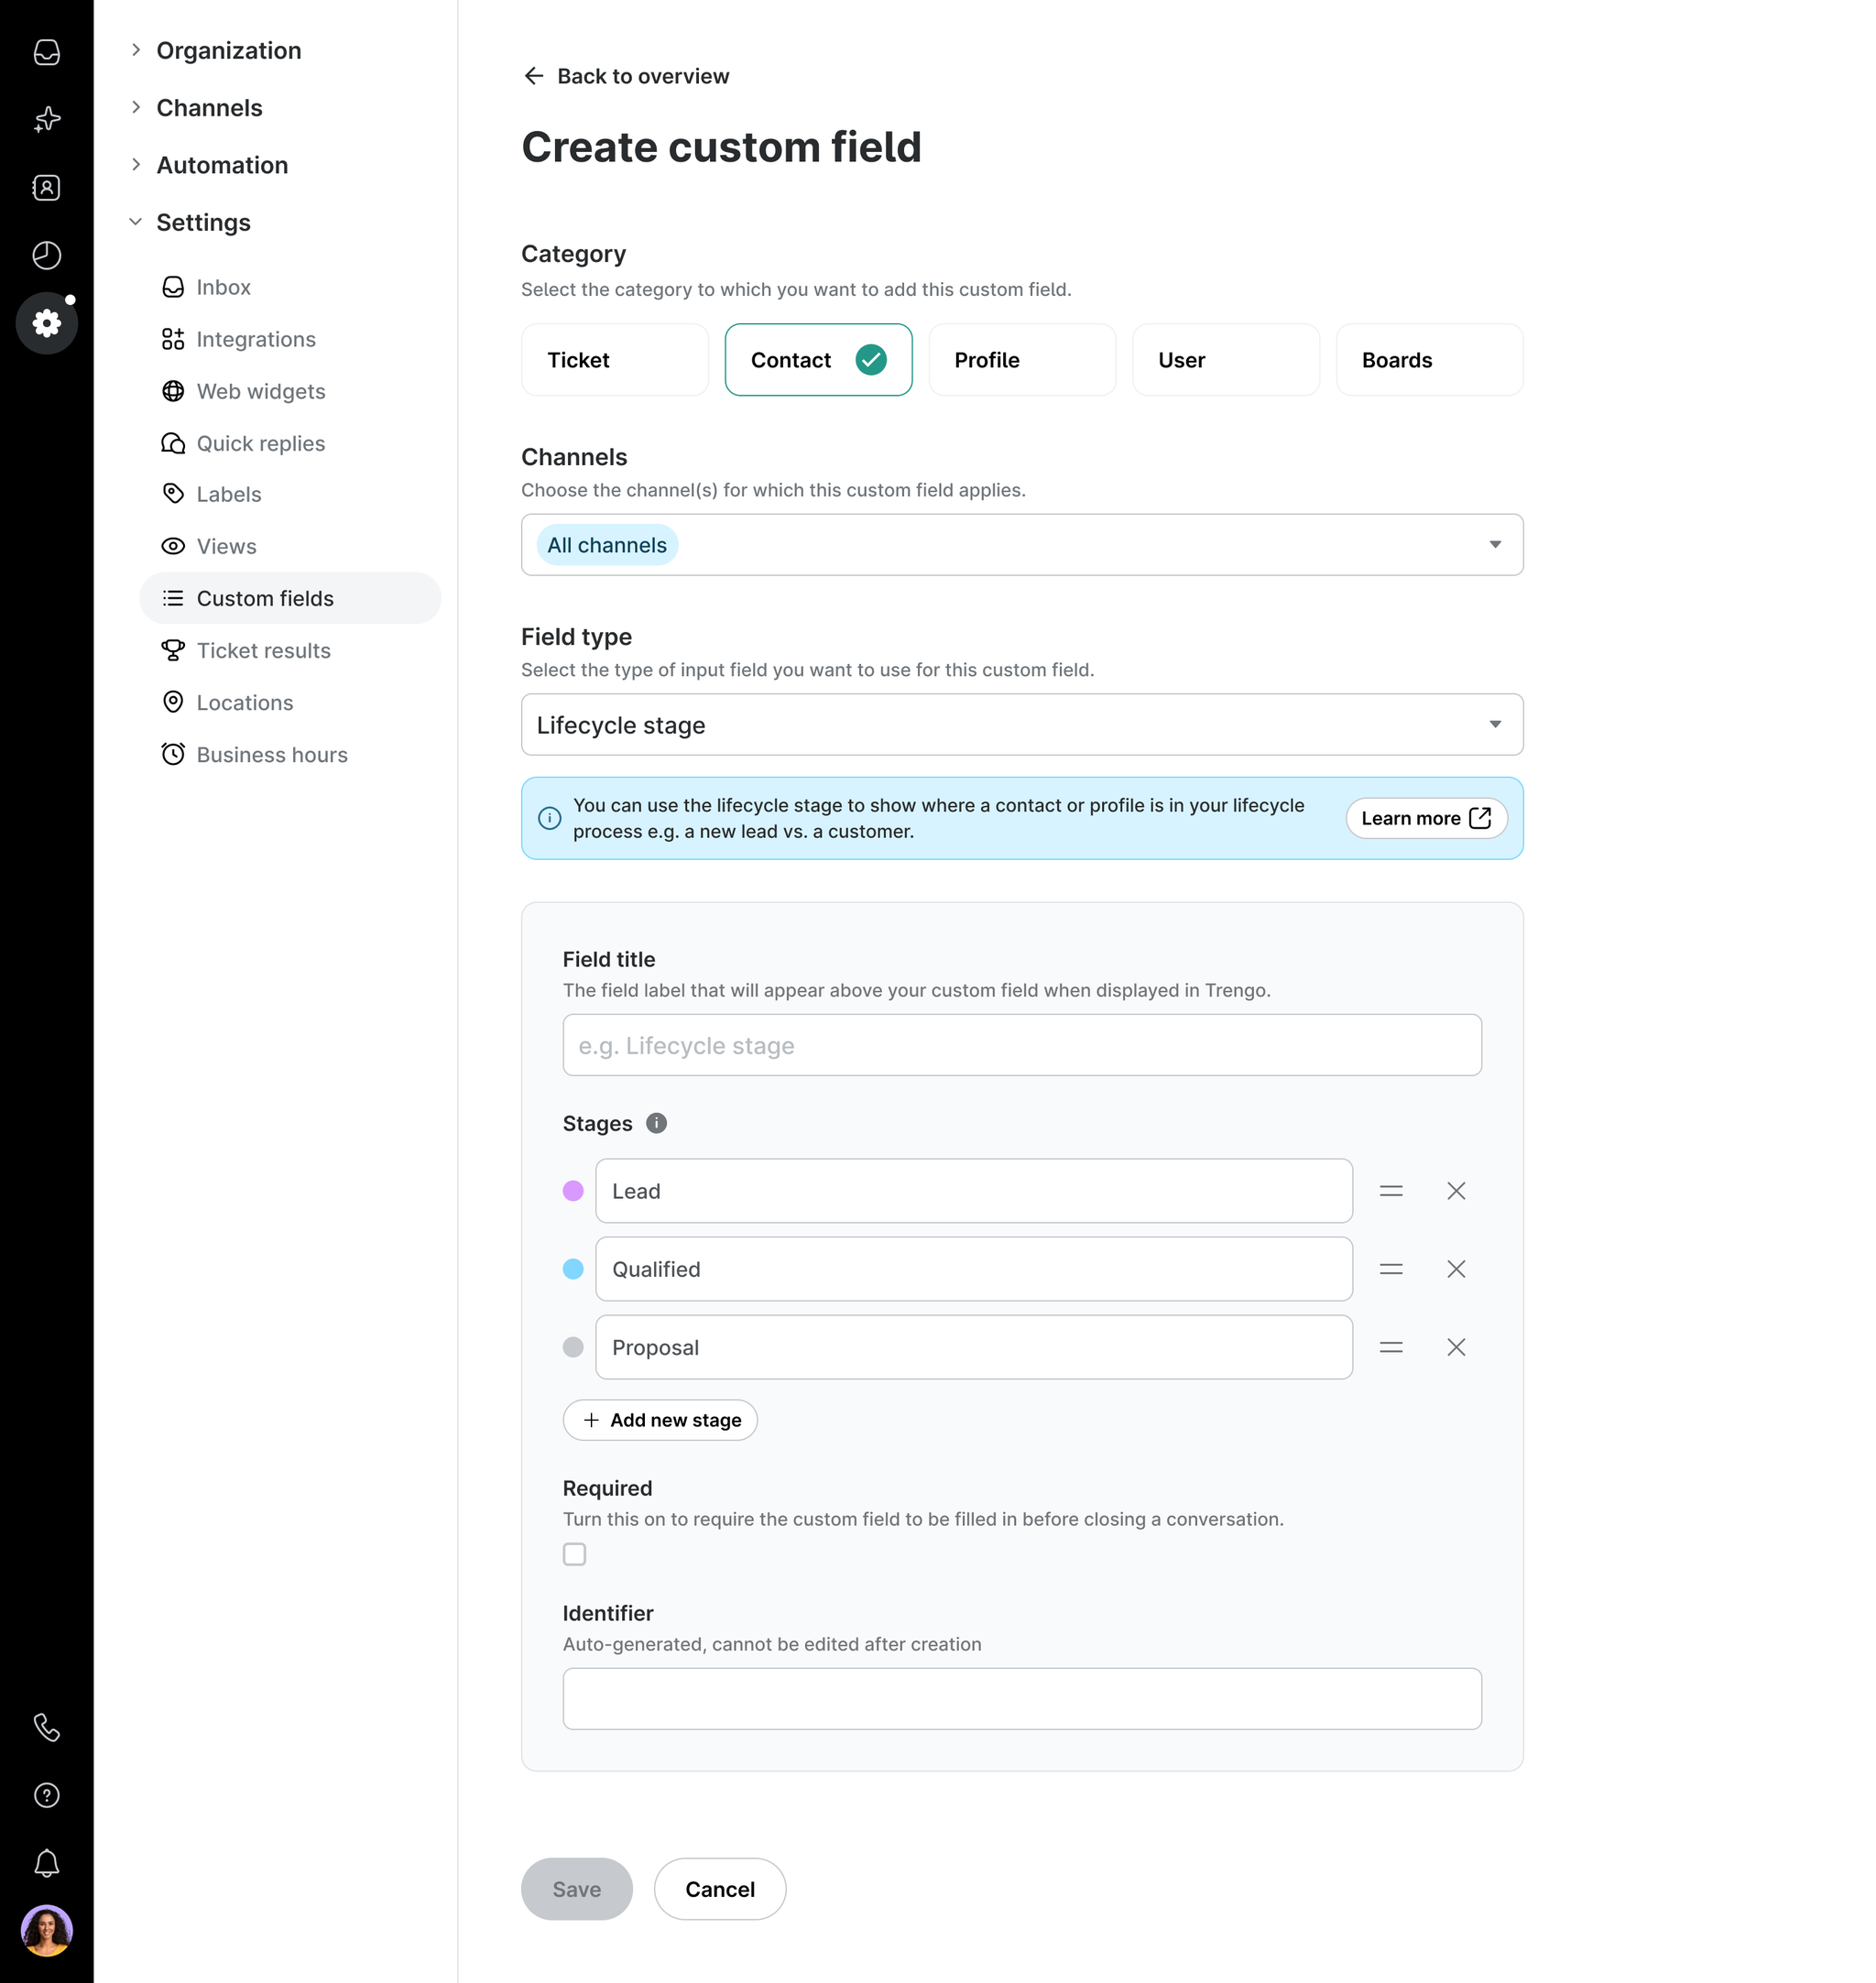
🔘 Lifecycle stage: You can use the lifecycle stage to show where a contact or profile is in your lifecycle process, e.g., a qualified lead vs. a customer, or to automate various actions linked to this field.
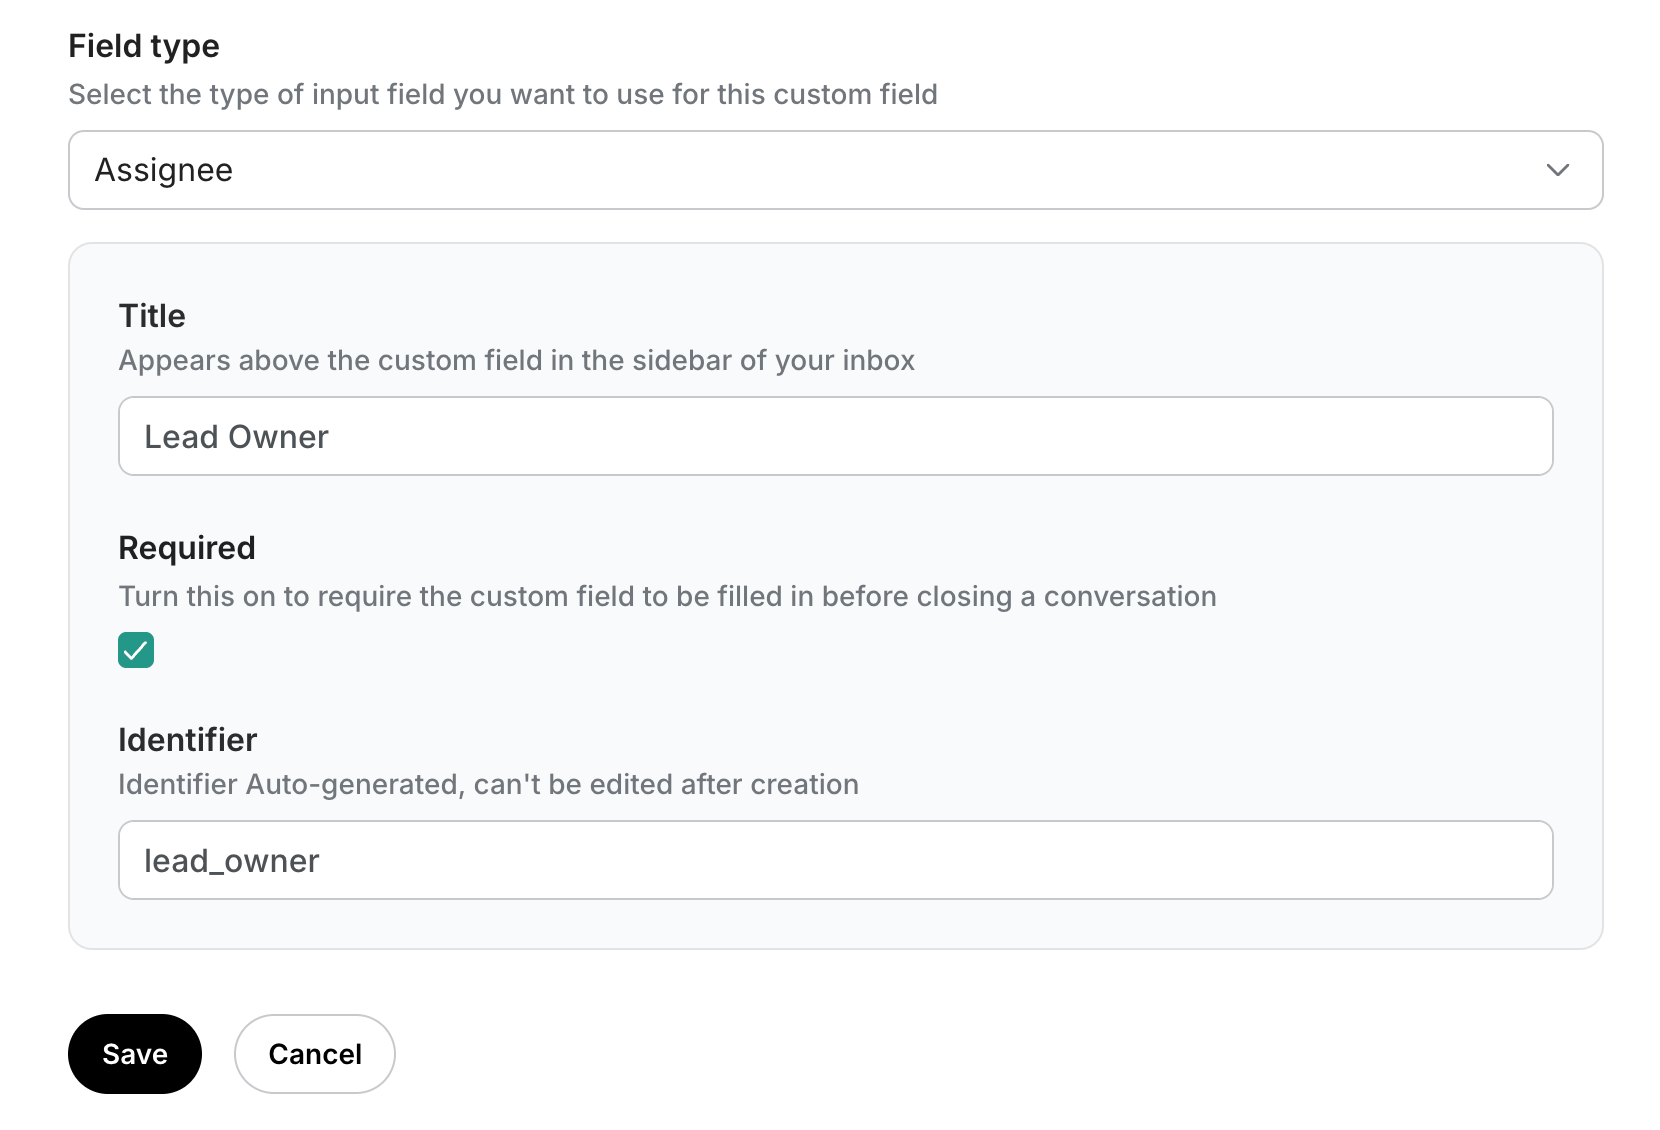
🔘 Assignee: You can use this field to designate who is responsible for owning a support incident, or managing and nurturing the lead throughout the sales lifecycle.
Custom fields’ overview
You can find an overview of your Custom fields in your Trengo account, by navigating to Settings > Settings > Custom fields. Here you can check your custom fields per category and edit or delete them.

With this information, you are now ready to add custom fields to your Trengo-inbox.