


With Trengo's Integration Hub, connecting your Roller account to your Trengo Inbox is a breeze. This integration empowers customer service teams in the attractions and entertainment industry to transform how they handle guest communication.
Please ensure you are an Admin in both Trengo and Roller before proceeding.
What does the Roller integration do?
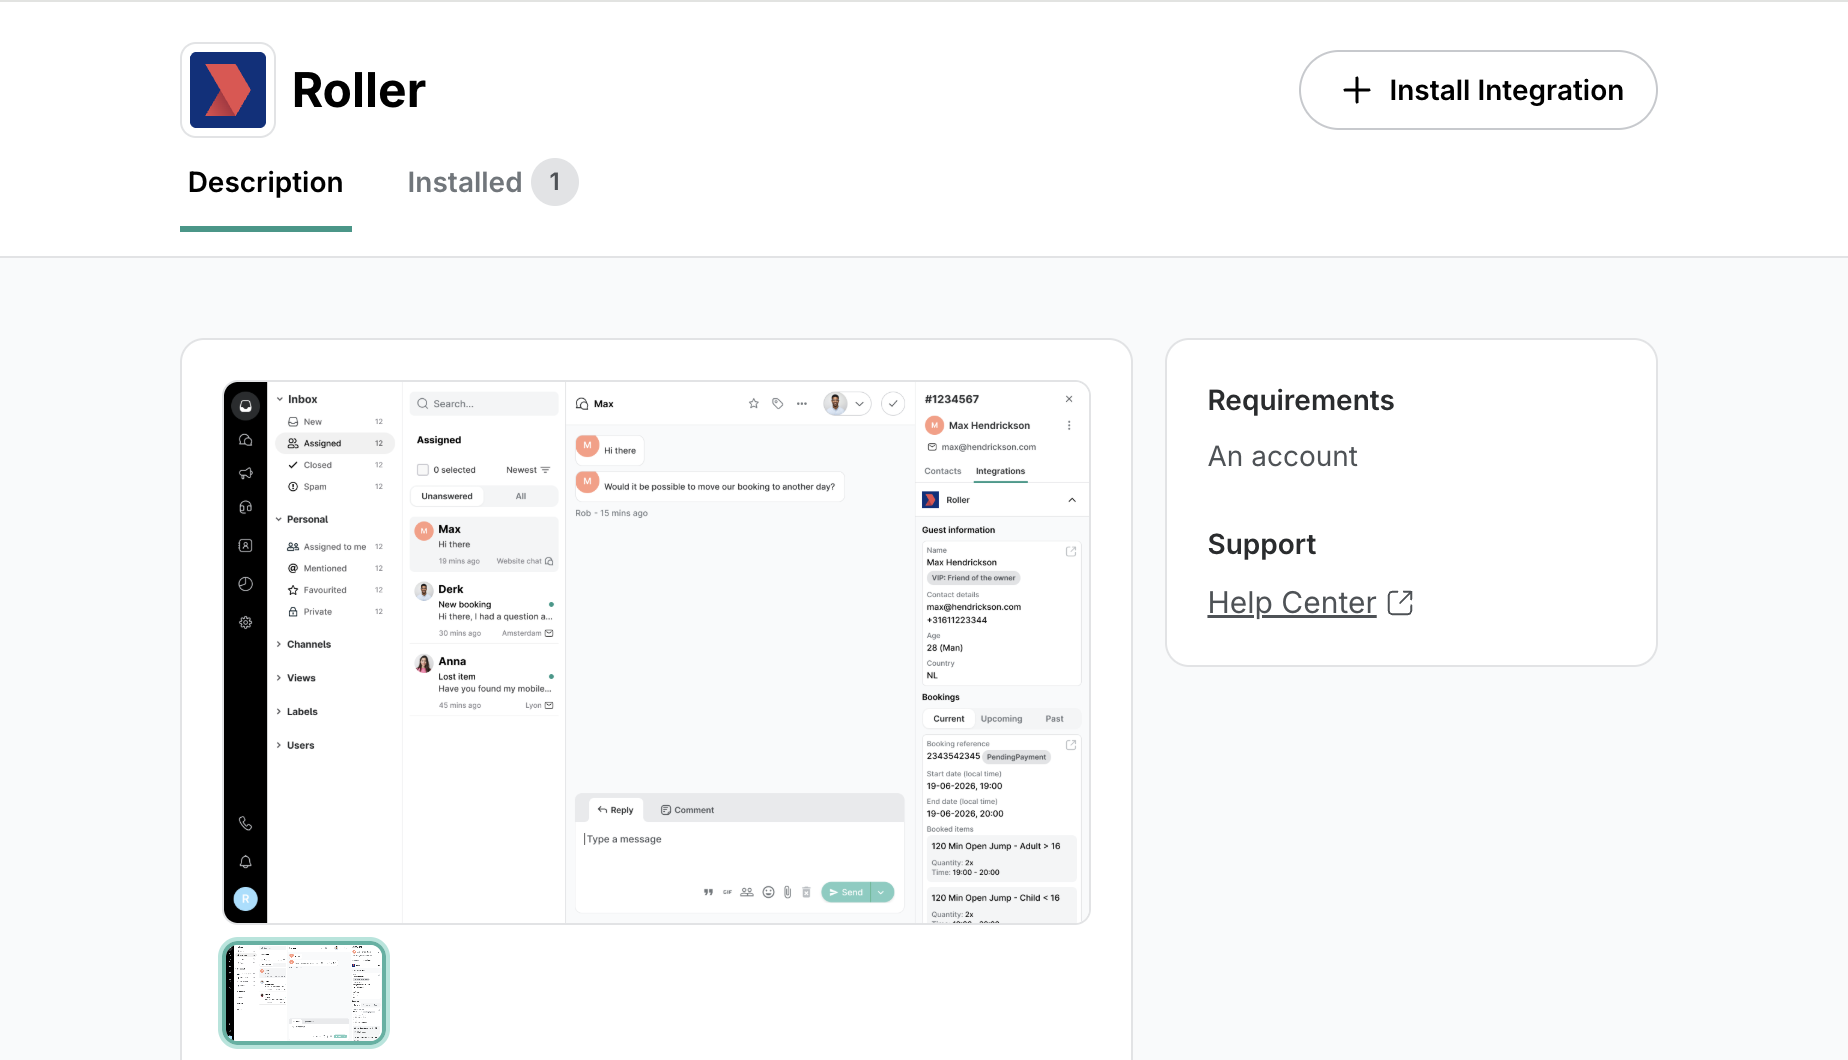
The Trengo and Roller integration displays booking details, such as guest name, booking status, and visit information, right next to messages in Trengo's inbox. This ensures agents always have the context they need to respond promptly and accurately, without switching between systems.
Key benefits:
- Access guest booking information directly within Trengo
- View booking status, guest details, and visit information
- Respond faster with full context at your fingertips
- No more asking guests to repeat booking references
- Manage all communication channels in one unified inbox
Step 1: Generate API credentials in Roller
- Log in to your Roller Venue Manager as an Admin
- Navigate to Settings > Integrations or API Access
- Create a new API integration for Trengo
- Give your integration a name (e.g., "Trengo Integration")
- Copy and save your API credentials:
- API Key or Access Token
- Venue ID (if required)
- API URL or Instance URL
Note: Keep these credentials secure as you'll need them in the next step. The exact location of API settings may vary depending on your Roller setup. If you're unsure where to find these settings, contact your Roller account manager or support team.
Step 2: Connect Roller to Trengo
- Navigate to Trengo Settings, then select Settings, followed by Integrations
- Select Leisure category
- Click the Roller card to open the integration interface
- Click Install Integration in the top right corner to open the installation modal
- Enter your Roller API credentials:
- Client ID: Paste the Client ID you copied from Roller
- Client Secret: Paste the Client Secret you copied from Roller
- Click Install Integration
Congratulations! You can now begin using Roller and Trengo together in your Inbox!

Using the Roller integration in Trengo
Once the integration is set up, booking information from Roller will automatically appear in your Trengo inbox:
- Open any conversation in Trengo
- Look for the Integrations tab in the right sidebar
- View guest booking details including:
- Guest name and contact information
- Booking reference number
- Booking status (confirmed, pending, cancelled)
- Visit date and time
- Ticket types and quantities
- Package or add-on details
- Total booking value
This information updates automatically, ensuring your team always has the latest booking details when communicating with guests.
Troubleshooting
Integration not showing booking data?
- Verify that your API credentials are correct
- Check that your Roller account has the necessary permissions enabled
- Ensure the guest's contact information in Roller matches the information in Trengo
Can't find API settings in Roller?
- Contact your Roller account manager or support team
- They can provide guidance on accessing API credentials specific to your setup
Need additional help?
- Contact Trengo support through the help center
- Reach out to your Roller account manager for API-related questions
Not finding the answer to your question? Contact our support team for assistance with your Roller integration setup.