Using Make.com unlocks the power of 1,900+ integrations to trigger journey automations and send automated WhatsApp templates to contacts saved in these systems. With this new capability, businesses can now start using automated transactional (proactive) WhatsApp messages (with open rates of over 90%) instead of traditional transactional emails (which have open rates below 30%). This enables businesses to send outbound messages at key customer touchpoints, such as booking confirmations, order receipts, tracking updates, or review requests.
Technical documentations for developers are available here:
Journey trigger: webhook received-
Otherwise, you can follow the steps below.
Part 1: Set up in Make.com
- Log into Make.com - Go to Make.com and log into your account. (If you don’t have an account, create one first.)
- Create a New Scenario - In the left menu, click on Scenarios and select Create new scenario.
- Add Your System - In Make.com, add the system you want to connect, like Shopify, HubSpot, or Microsoft Dynamics.
- Add the HTTP Module. To trigger a Webhook from Trengo’s Journey, add the HTTP (Make a Request) module.
- Enter the Webhook URL. Under URL, enter the Webhook URL from your Trengo Journey. (Follow the instructions from Part 2 below to retrieve the Webhook URL from Trengo.)
- Configure HTTP Settings
- Method: Set to POST.
- Body Type: Set to Raw.
- Content Type: Set to JSON (application/json)
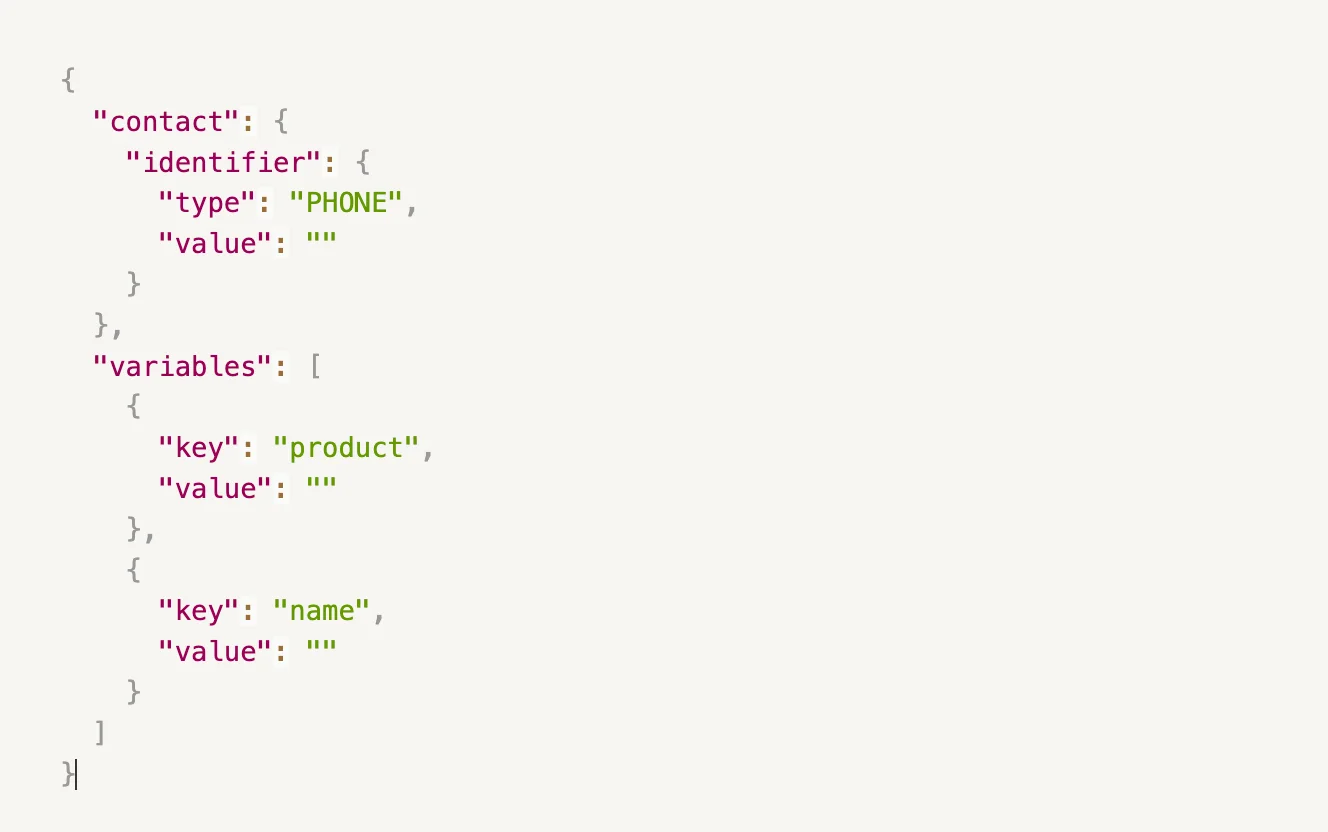
- Insert JSON Data - (API documentation to get the JSON). In Request content, add the JSON data to send to Trengo’s Webhook. Here’s an example:

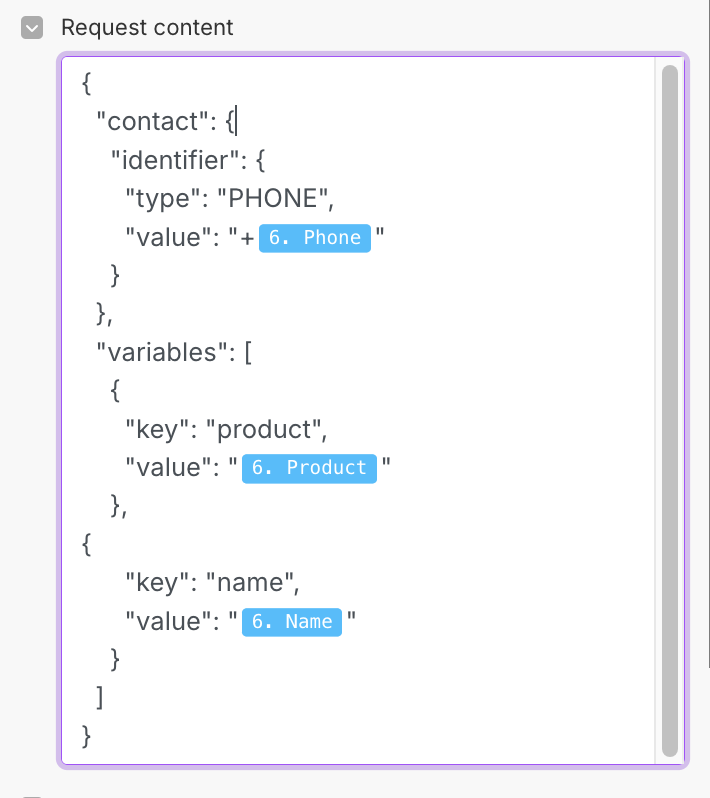
- Set Up Values. Define what information you want to store for each value (data from the third-party system you connected as first steps in Make.com).
- Example Setup. When values and variables are set up correctly, data like phone, product, and customer name from Airtable (for this example) will be pushed to Trengo using JSON.

Part 2: Retrieve the Webhook URL in Trengo
- Log into Trengo. Go to app.trengo.com and log in.
- Select or Create a Journey. Go to Journeys (https://app.trengo.com/workflows/) and select a Webhook-only Journey or create a new one by selecting Webhook received.
- Retrieve the Webhook URL & add. In the Journey, click on ⚙️ where you find the Webhook URL
- Add Variables
- Go to ⚙️ Settings → General settings → Advanced tab to add the specific variables, so the Webhook can receive the specific information.
- Use the same variables from Step 9 in Make.com (e.g., Phone, Product, Name) so Trengo can process incoming Webhook information.
Part 3: Send WhatsApp Templates in a Webhook Journey
Please note that you need an active WhatsApp channel and approved templates to continue. Set them up at https://app.trengo.com/admin/channels2/wa_business and https://app.trengo.com/admin/wa_templates.
- Add WhatsApp Template in Journey. In your Trengo Journey, click on [ + ] and select Send WhatsApp template.
- Select WhatsApp Channel and Template. Choose the WhatsApp channel and template you want to use.
- Set Up Dynamic Variables. If your template includes dynamic fields, assign variables to them as shown in the example below.


