Adding Instagram to your Trengo inbox will allow you to manage all your Instagram Direct Messages, Comments and Mentions directly in Trengo.
ℹ️ Do note you need to have an Instagram Business account, that is linked to your Facebook page. You also need to be an admin of that Facebook page.
Follow the steps below to connect your Instagram page to your Trengo inbox.
1. Navigate to Settings > Channels > Instagram and click ‘Connect Instagram’;

2. You will be redirected to the Facebook login page. Log in with a Facebook account that is linked to the Instagram Business account and has administrator rights;

3. Select the Instagram Business account you’d like to connect and click ‘Next’;

4. Select the Facebook page that is connected to the Instagram business account and click ‘Next’;

5. Enable all permissions and click ‘Done’;

6. Click ‘OK’;

7. Configure and create the Instagram channel;

1. Internal name: The name of your Instagram channel.
2. Teams: Choose the teams that have access to the channel.
ℹ️ If you want different teams to handle the different types of messages, you can create two separate Instagram channels: one for Direct Messages and one for Instagram's comments and mentions.
3. Connected account: Here you can find the user who connected the Instagram account.
4. Instagram Business Profile: Select the Instagram account you connected.
5. Create channel: Click this button when you’re done configuring the channel.
Now you’ve created your channel, you can go ahead and configure the Instagram channel further.
8. Configure your Instagram channel and scroll down to enable or disable different features;

1. Instagram Business Profile: The Instagram account connected to this channel.
2. Connection: In case the administrator of the account changed their password, you can reconnect your Facebook page here. This is also recommendable in case you experience issues with your Instagram channel.
3. Direct Messages: In case you’d like to receive Instagram’s Direct Messages and Story Replies in Trengo, you need to enable ‘Allow access to messages’ in Instagram.
4. Comments: Enable or disable the option to receive comments on your Instagram posts in Trengo.
5. Mentions: Enable or disable the option to receive Mentions in Trengo.
Do not forget to click ‘Update channel’, and you’ve now connected your Instagram account! It is also possible to connect your Facebook page to your Trengo inbox.
With Trengo, it’s possible to add an SMS channel via your Twilio account, and send SMS messages or SMS broadcasts to your customer. In this article, we’ll show you how to add this channel.
ℹ️ If you do not have a Twilio account, feel free to create one.
Follow the steps below to connect your Twilio account via an SMS channel to your Trengo inbox.
1. Navigate to Settings > Channels > SMS and click the ‘plus’ icon;

2. Choose an internal name for your channel and add the team(s) responsible for this channel;

3. Click ‘Add new account’;

4. A pop-up window will appear, asking for your Twilio Account SID and Twilio Auth Token;

ℹ️ You can find your Twilio Account Sid and Twilio Auth Token by navigating to your Twilio Console and logging in with your credentials. The information can be found under ‘Account info’.

5. Copy and paste your Twilio Account SID and Twilio Auth token in the Trengo window and click ‘Add account’;

6. Select if this SMS channel is ‘One-way’ or ‘Two-way’;

🔘 One-way (send only): This is a non-reply SMS. The receiver won't be able to respond to your SMS. The one-way SMS method is mainly used for important updates or news. Be aware that due to national or local legislation, the use of a one-way SMS channel may not be allowed in your country.
🔘 Two-way (send and receive): Send and receive SMS messages.
7.1. In case you chose ‘One-way’, add your sender name;

7.2. In case you chose ‘Two-way’, select the phone number you’d like to use;

8. Make sure ‘Agent conference’ is enabled for your Twilio account;

7. Click ‘Create channel’.
You’ve now successfully set up your SMS channel in Trengo, and connected your Twilio account and phone number to it.
By adding SMS to your web widget, you're allowing your site visitors to easily reach you through SMS via your website. In this article, we’ll show you how to do this.
You can add your SMS channel to your website widget by following the steps below.
1. Navigate to Settings > Settings > Web widgets and select your web widget;

2. Click ‘SMS’ from the list of possible channels you can add;

3. Set up your SMS channel;

1. Enabled: Enable your SMS channel for the web widget here.
2. Channel: Select the SMS channel you want to connect to your web widget.
3. Conversation form: When enabled, the visitor is able to leave their phone number to receive an SMS to easily initiate the conversation.
Don’t forget to update your widget, by clicking ‘Update widget’.
Adding Telegram to your Trengo inbox will allow you to manage all incoming messages directly in Trengo. Unlike WhatsApp with their WhatsApp business, there is no dedicated Telegram App for business. Fret not, you can make this happen by making a Telegram bot. By doing so, you are creating a branded Telegram for your company.
The bot is necessary to make the API connection. Remember, no bot = no token = no connection.
ℹ️ Do note you need to have an admin account for the Telegram account you’d like to add.
Follow the steps below to connect your Telegram account to your Trengo inbox.
1. Install the Telegram app on your desktop;
2. Connect your phone number, in case you do not have an account yet;
3. Click 'BotFather' and initiate a new conversation by typing '/newbot';

4. Type the name of your new bot;

5. Send one more message with your bot’s name, including 'bot' at the end;

6. Copy the provided access token;
7. Within Trengo, navigate to Settings > Channels > Telegram and click the ‘plus icon’ or ‘Connect Telegram’;

8. Give your channel a name and select the team(s) responsible for this channel;

9. Paste the access token in 'Token'. The username will be filled in automatically;

10. Click the ‘Create channel’ button.
You have now successfully added Telegram to your Trengo inbox.
For your customer to find your company Telegram they must search for the bot name and not the company phone number. The search can be done in-app, once your bot is created any user should be able to find the bot and start a conversation.
By adding Telegram to your web widget, you're allowing your site visitors to easily reach you through Telegram via your website. In this article, we’ll show you how to do this.
You can add your Telegram channel to your web widget by following the steps below.
1. Navigate to Settings > Settings > Web widgets and select your web widget;
2. Click ‘Telegram’ from the list of possible channels you can add;

3. Set up your Telegram channel;

1. Enabled: Enable your Telegram channel for the web widget here.
2. Channel: Select the Telegram channel you want to connect to your web widget.
Don’t forget to update your widget, by clicking ‘Update widget’.
By adding a Voice channel to your Trengo inbox, you’ll be able to make outbound calls, pick up inbound calls, and much more! Transfer a call to one of your colleagues or another team, record voice calls, and an IVR. In this article, we’ll show you how to add a Voice channel to Trengo.
Please follow the steps below to add a Voice channel to your Trengo account.
1. Navigate to Settings > Channels > Voice and click the ‘plus’ icon or ‘Connect Voice’;

2. Choose how you want to connect your account or device to Trengo and continue the setup.
🔘 Phone calls via Twilio: Click ‘I have a Twilio account’ to connect your Twilio account to Trengo via a Voice channel. In case you do not have an account with Twilio yet, feel free to create a Twilio account.

🔘 Phone calls via SIP devices (Voys.nl): If you’d like to register calls from SIP devices in your inbox using your Voys account, click ‘Voys.nl’ and continue setting up your Voice channel in Trengo using Voys.

🔘 Phone calls via SIP devices (Custom VoIP): Select the ‘Custom VoIP’ button to register voice calls from your own SIP device and set up your Voice channel using your custom VoIP.

NOTE:
Other than Twilio, Trengo does not have a full integration with the providers, Trengo would still be able to make a connection to log the conversation, however, the conversation will still take place on their platform.
With Twilio, we have a full integration that allows you to pick up calls, do IVR, recording and many more.
By adding Voice to your web widget, you're allowing your site visitors to easily reach you by phone, via your website. In this article, we’ll show you how to do this.
You can add your Voice channel to your web widget by following the steps below.
1. Navigate to Settings > Settings > Web widgets and select your web widget;
2. Click ‘Voice’ from the list of possible channels you can add;

3. Set up your Voice channel;

1. Enabled: Enable your Voice channel for the web widget here.
2. Channel: Select the Voice channel you want to connect to your web widget.
3. Call via browser: When enabled, visitors are able to start a phone call from the browser to the selected phone number. The costs for these calls will be deducted from your Trengo balance.
Don’t forget to update your widget, by clicking ‘Update widget’.
NOTE:
The general greeting is in Dutch, you would need to change it manually should you prefer to have it in other languages.
Are you ready to lift your customer communication to the next level, using the WhatsApp Business API? With Trengo as your official WhatsApp Business Solution Provider, you’ll be up and running in no time.
Before you get started, feel free to learn more about the WhatsApp Business API, or directly test the WhatsApp functionality in Trengo. Maybe you are already using the WhatsApp Business App and are curious about the differences with the WhatsApp Business API, or you would like to read more about the limitations of this channel.
In case you’d like to connect a phone number that is already active on WhatsApp, please see this Trengo Help Center article.
Before we start, please ensure that these steps are done in the web browser and not in the Trengo desktop app.
To connect your number to the WhatsApp Business API via Trengo, follow the steps below.
1. Navigate to Settings > WhatsApp Business and click ‘Connect your number’;

2. Carefully read the requirements needed for connection, and click ‘Get started’;

3. Agree to having a Facebook account and understanding the information, and click ‘Next’;

ℹ️ If you do not yet have a Facebook account, you can create one. Do note that some restrictions may apply within the first 24 hours.
4. Read the information on the screen, agree to have a phone number that meets all conditions, and click ‘Next’;

ℹ️ When connecting your number to the WhatsApp Business API, you won’t be able to use it with the WhatsApp (Business) App anymore.
5. Read the information on the screen, click ‘Continue with Facebook’ and follow the instructions given by Facebook;

6. Once you’re back in Trengo, check your information and click ‘Next’;

7. You have now successfully activated your number on the WhatsApp Business API and can get started straight away.
ℹ️ Make sure your Facebook Business Account is verified within 30 days of registering. As long as your Facebook Business Account is not yet verified, you will be in the ‘Trial’ phase of the WhatsApp Business API. Read more about this phase in this Meta for Developers article.
To start a conversation with a customer via the WhatsApp Business API, you can use a WhatsApp template. This is a pre-approved message you need to submit and has to be approved by Meta before you are able to send it to a customer. Keep WhatsApp’s conditions in mind, when creating a new WhatsApp template.
Because it is not possible to start a WhatsApp conversation via the WhatsApp Business API by typing a message, and a conversation via the WhatsApp Business API gets closed 24 hours after the last inbound message, WhatsApp templates can help you to show initiative and keep in touch with your customers.
A handy example of a WhatsApp template could read as follows: ‘Oops! We were unable to answer your question in time. If you still want an answer from us, please respond with a thumb (👍) to this message! We will answer your question as soon as possible.’
ℹ️ We've compiled more than 50 WhatsApp template examples for you in this spreadsheet.
If you’d like to submit a WhatsApp template in Trengo, follow the steps below.
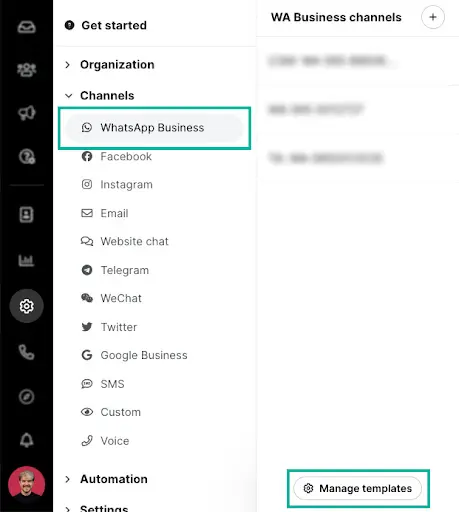
1. Navigate to Settings > Channels > WhatsApp Business > Manage Templates
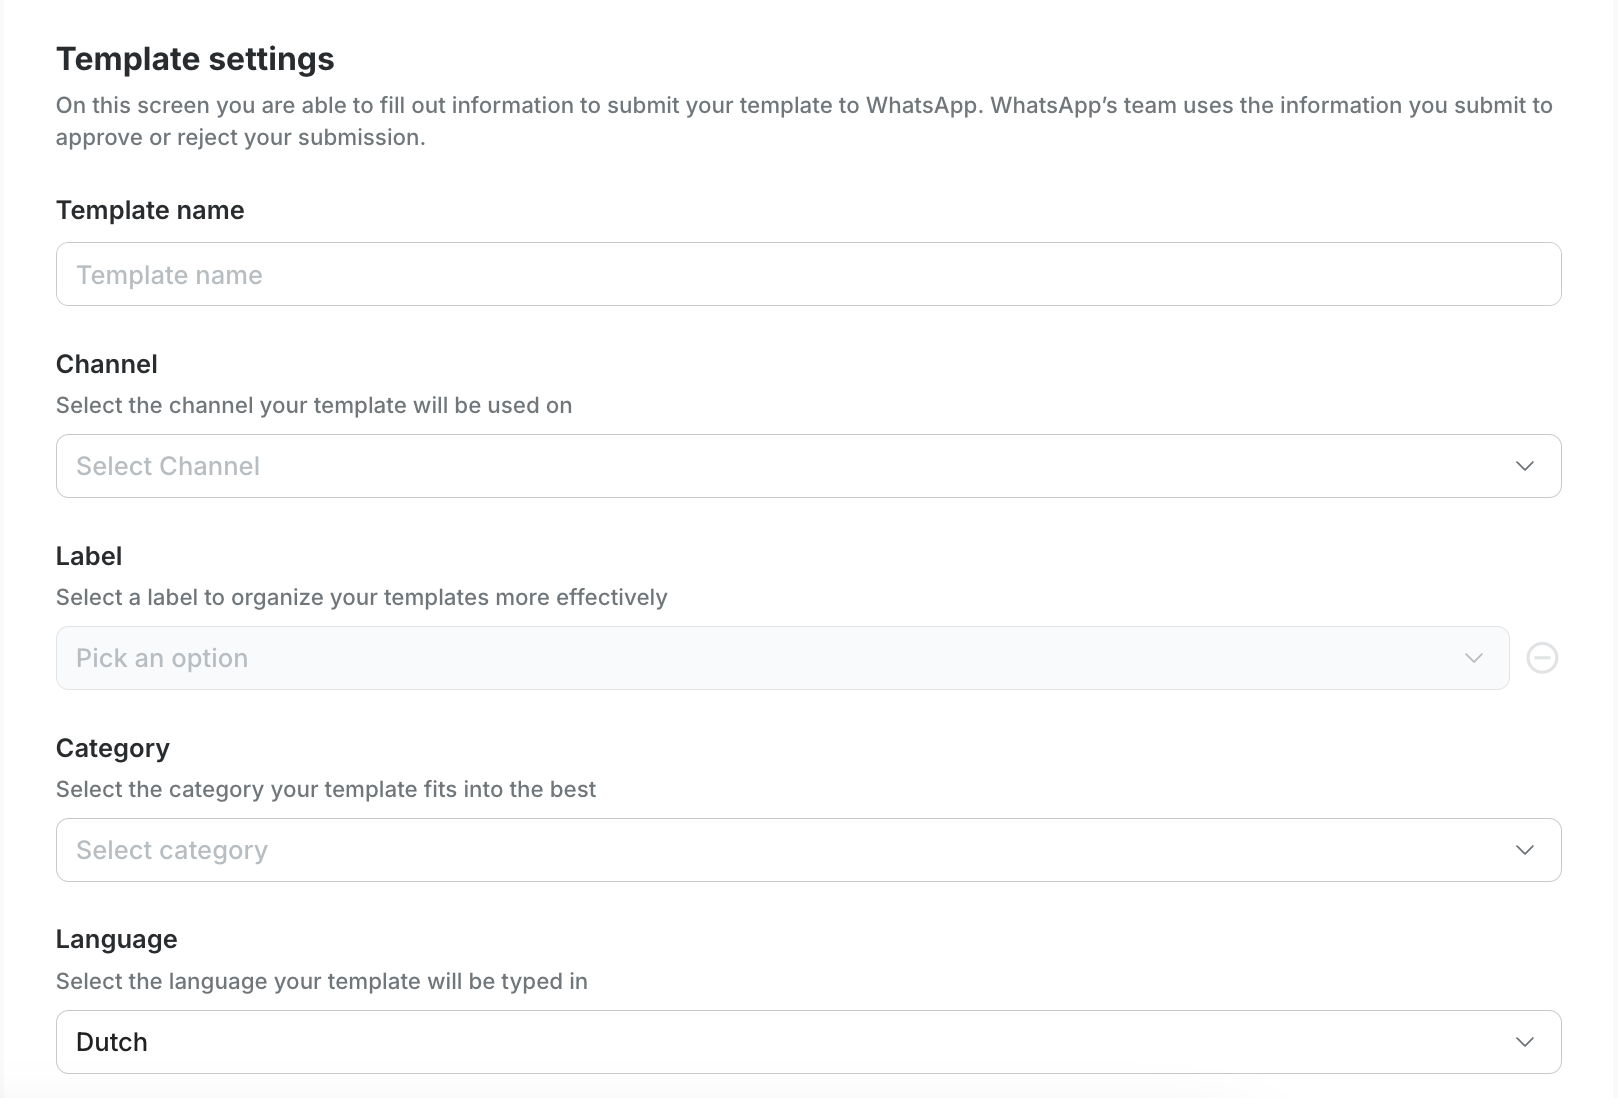
2. Click ‘New Template’ and fill in the required details;

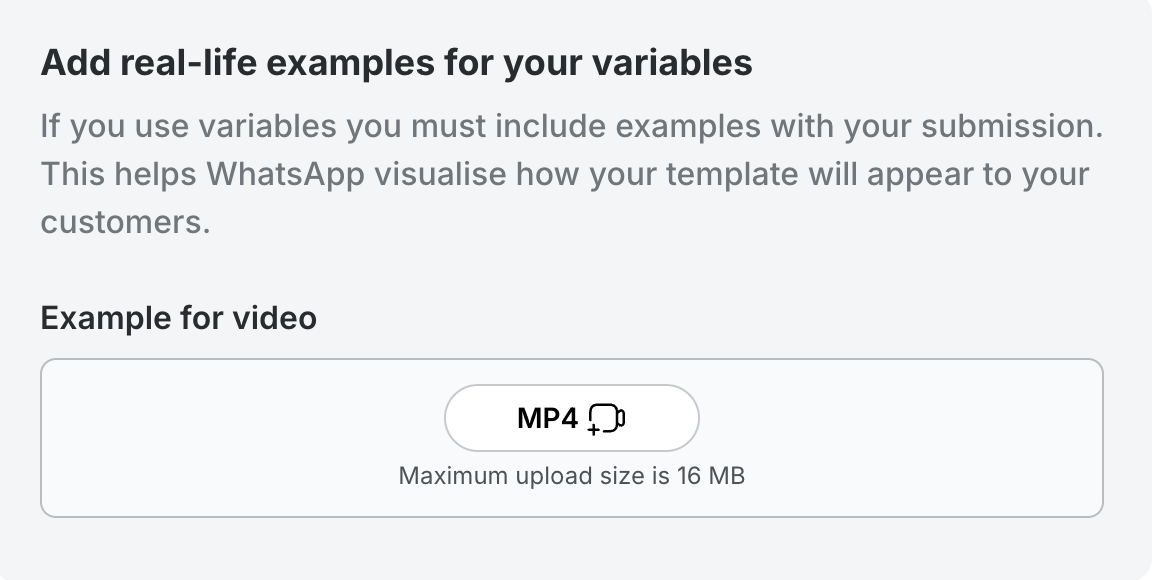
3. Header: Optionally add a header to your WhatsApp template.
UPDATE: for channels under Trengo BSP, you will be able to add image or video in your header.
You can follow the steps below:

Once you scroll down you will see a sub-section where you can upload your image as a header or video as a header:

Pro's tips:
4. Body: Type the message the template should contain. Don’t forget you can add variables, to make your message more personal.
5. Footer: Optionally add a footer to your WhatsApp template.
6. Buttons: You are able to add several types of buttons to the template:
- Quick reply - up to three buttons;
- URLs (links) - up to five buttons;
- Call - one button to allow users call you via a land line phone number.

You can drag-and-drop button categories to change the order in the template.
Note that Meta collapses buttons into a sub-menu “See all options” when there are more than three buttons added to a template.
ℹ️ Do note you can only use headers, footers, and buttons when your WhatsApp Business Solution Provider (BSP) is Trengo. In case you want to make use of buttons, but your WhatsApp Business API (WABA) is connected to another BSP, you can migrate your channel at the earliest.
Click 'Submit for WhatsApp Approval’ to send your template in for review by Meta.
Once you have submitted your WhatsApp Template, Meta will review it. They either accept or reject your Template.
✅ When your Template is approved, your colleagues can immediately use templates to actively approach customers via WhatsApp in Trengo.
❌ In case your Template gets rejected, please review your latest submission, and check for any issues that could cause the rejection. Always keep the WhatsApp Commerce Policy in mind.
ℹ️ Be aware that additional costs are associated with the use of WhatsApp Templates. For an accurate and up-to-date overview, please see our explanation about WhatsApp’s conversation-based pricing. Secondly, Meta occasionally will have an ongoing experiment. If you notice that the messages aren't sent to a customer, one of the possible reasons is that they are a part of the experiment so you may contact them through other communication avenues. For more information, you can access it here.
By adding WhatsApp to your web widget, you're allowing your site visitors to easily reach you through WhatsApp via your website. In this article, we’ll show you how to do this.
You can add your WhatsApp channel to your website widget by following the steps below.
1. Navigate to Settings > Settings > Web widgets and select your web widget;
2. Click ‘WhatsApp’ from the list of possible channels you can add;

3. Set up your WhatsApp channel;

1. Enabled: Enable your WhatsApp channel for the web widget here.
2. Channel: Select the WhatsApp channel you want to connect to your website widget.
Don’t forget to update your widget, by clicking ‘Update widget’.