


Ontdek hoe u uw AI-agent kunt installeren en configureren, zodat deze gesprekken kan voeren, kennis kan toepassen en workflows effectief kan automatiseren.

Koppel kennisbronnen aan elkaar
Uw AI-agent maakt gebruik van kennisbronnen om vragen van klanten te beantwoorden. Zonder gekoppelde bronnen kan hij geen antwoord geven op vragen die op kennis zijn gebaseerd.
Hoe instellen

- Ga naar Configuratie
- Klik onder 'Bronnen koppelen' op 'Bronnen selecteren'
- Kies je informatiebronnen
Ondersteunde bronnen
- Helpcentrum / Kennisbank
- Fragmenten
- Notion
Koppel de AI-agent aan een kanaal
Je kunt je AI-agent rechtstreeks aan een kanaal koppelen om inkomende gesprekken automatisch af te handelen.
Hoe instellen
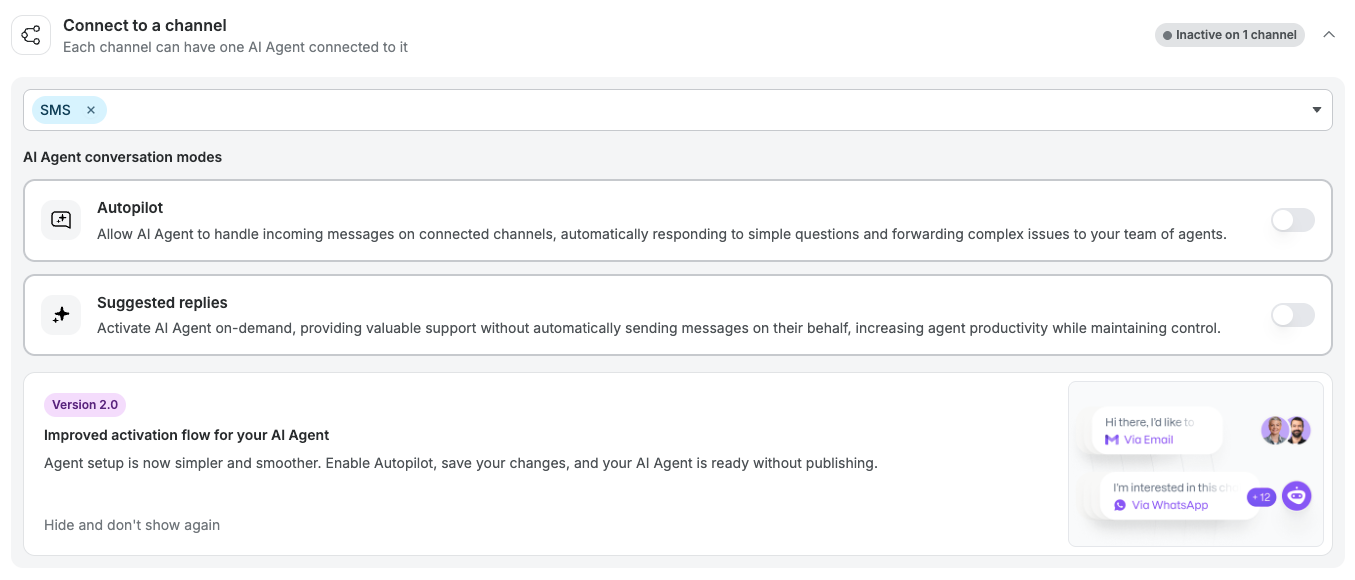
- Ga naar 'Verbinden met een kanaal'
- Klik op 'Kies een kanaal'
- Kies een kanaal (bijv. e-mail, WhatsApp)
Belangrijk:
Er kan slechts één AI-agent per kanaal worden gekoppeld.
Tip:
Als je Journeys gebruikt en een kanaal daar al is gekoppeld, koppel datzelfde kanaal hier dan niet nogmaals. Zo voorkom je dubbele verwerking en conflicten.
Link-reizen
Met Journeys kunt u specifieke workflows automatiseren en deze koppelen aan uw AI-agent.
Hoe instellen
- Ga naar 'Gekoppelde reizen'
- Klik op 'Reis aanmaken' of 'Reis koppelen'
- Kies de reis die je wilt maken
Als er geen reizen zijn gekoppeld, werkt je AI-agent zelfstandig.
Stel de standaardtaal in
De AI-agent detecteert automatisch de taal van de klant. Als hij de taal niet kan detecteren, schakelt hij over op de standaardtaal.
Hoe instellen
- Ga naar de standaardtaal
- Kies de taal van uw voorkeur (bijv. Engels)
Een overzicht genereren bij escalatie
Wanneer een gesprek wordt doorverbonden naar een menselijke medewerker, kan de AI-agent een samenvatting van het gesprek genereren.
Hoe instellen
- Schakel 'Samenvatting genereren bij escalatie' in of uit
Zo krijgt je team snel inzicht in de context van het gesprek.
Inactieve gesprekken automatisch sluiten
Je kunt gesprekken automatisch afsluiten wanneer klanten niet meer reageren.
Hoe instellen
- Inactieve gesprekken automatisch sluiten inschakelen
- Stel de inactiviteitstijd in (bijv. 1 uur)
Opmerking: De tijd voor automatisch sluiten moet langer zijn dan de opvolgingstijd.
Stuur herinneringen als er geen reactie komt
De AI-agent kan een herinneringsbericht sturen als een klant niet reageert.
Hoe instellen
- Schakel de optie 'Een herinnering sturen als er geen reactie is' in
- Stel de tijd in dat er geen activiteit mag zijn voordat er een herinnering wordt verzonden (bijv. 1 uur)
Opmerking: De follow-up-tijd moet korter zijn dan de automatische sluitingstijd.
Activering
Zodra uw configuratie is voltooid:
- Autopiloot inschakelen
- Klik op Opslaan
Uw AI-agent begint automatisch gesprekken af te handelen.
Integraties en aangepaste acties koppelen
Gebruik het tabblad ‘Mogelijkheden’ om je AI-agent te koppelen aan externe systemen en gegevensbronnen. Hiernaar kun je rechtstreeks verwijzen in de instructies van je scenario.
Shopify-webwinkel
Koppel je Shopify-winkel zodat de AI-agent producten, prijzen en veelgestelde vragen kan doorzoeken.
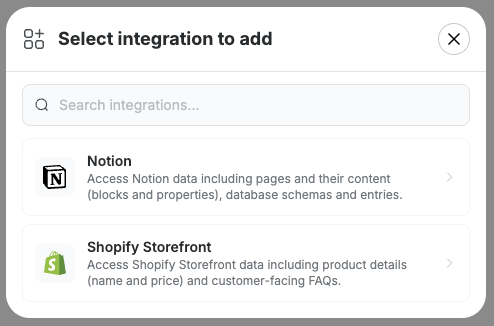
Hoe maak je verbinding
- Ga naar het tabblad Mogelijkheden
- Klik op 'Integratieactie toevoegen'
- Kies Shopify Storefront
- Voer in het veld 'Winkelnaam' je Shopify-subdomein in — alleen de naam, zonder .myshopify.com. Als de URL van je winkel bijvoorbeeld my-shop.myshopify.com is, voer dan my-shop in
- Klik op 'Connect shop'
Waar vind je je bedrijfsnaam: Log in op je Shopify-beheerderspaneel. Het gedeelte vóór .myshopify.com in de URL staat de naam van je winkel.
Toepassing in een scenario
"Zoek via de Shopify Storefront het product op waar de klant naar vraagt en vermeld de prijs in je antwoord."
Notion
Koppel je Notion-werkruimte om de pagina’s en databases ervan te gebruiken als kennisbron voor je AI-agent.
Hoe maak je verbinding
- Ga naar het tabblad Mogelijkheden
- Klik op 'Integratieactie toevoegen'
- Kies Notion
- Geef toestemming voor toegang tot je Notion-werkruimte
Zodra de verbinding tot stand is gebracht, kan de medewerker inhoud van je Notion-pagina’s ophalen en gebruiken bij het beantwoorden van vragen van klanten.
Toepassing in een scenario
"Gebruik Notion om het gastenbeleid op te zoeken en neem het betreffende gedeelte op in je antwoord."
Aangepaste acties
Met aangepaste acties kunt u elk extern systeem koppelen door een API-eindpunt naar keuze aan te roepen. Dit is handig voor het opzoeken van bestellingen, het controleren van de beschikbaarheid, het opvragen van loyaliteitssaldi of elk ander systeem dat uw team gebruikt.
Hoe stel je een aangepaste actie in?
- Ga naar het tabblad Mogelijkheden
- Klik op 'Actie toevoegen'
- Stel het volgende in:
- Naam van de actie – Geef deze een duidelijke naam. Zo zul je ernaar verwijzen in de scenario-instructies.
- Wanneer en waarom deze actie moet worden gebruikt – Leg in eenvoudige bewoordingen uit wanneer de agent deze actie moet uitvoeren. Wees concreet: hoe duidelijker dit is, hoe betrouwbaarder de agent de actie zal activeren.
- Parameters (Verzamelen) – Geef aan welke gegevens de medewerker van de klant moet verzamelen voordat hij de API-aanroep uitvoert. Voeg voor elke parameter een naam en een beschrijving toe, zodat de medewerker weet wat hij moet vragen.
- Eindpunt-URL en methode – De volledige API-URL en de HTTP-methode (GET of POST). Hiervoor hebt u API-documentatie of technische ondersteuning nodig.
- Parameters (Verzenden) – Wijs de verzamelde parameters toe aan het exacte formaat dat de API verwacht.
- Kopteksten – Voeg de benodigde kopteksten toe, zoals autorisatiesleutels of het inhoudstype.
- Klik op 'Actie toevoegen'
Toepassing in een scenario
"Gebruik de actie 'Bestelstatus' om de bestelgegevens van de klant op te halen voordat u reageert."
"Als de klant vraagt naar de beschikbaarheid, gebruik dan de functie voor het opzoeken van boekingen."
Voorbeelden van aangepaste acties
- E-commerce: bestelstatus, voorwaarden voor retourneren, loyaliteitspunten
- Horeca (THL): beschikbaarheid van reserveringen, upgrades, activiteitenprogramma’s
Hulp nodig?
Klik in het installatievenster op ‘Hulp nodig bij het instellen?’ voor meer informatie.